

Appearance
Container Operations
Containers are versioned items within a project. Each container holds a design - typically a PCB layout, schematic, multi-board panel, or a generic folder of files. EEforce tracks full version history for every container.
Naming Rules
Container names must follow these rules:
- Forbidden characters:
<>\:"/ - Length: 3 to 40 characters
- Must be unique within the project
Spaces, dots, hyphens, and underscores are all allowed.
Valid: Main_Board_01, My Board Rev-2, Project.v3Invalid: Bo (too short), Design/Main (contains /), AB (under 3 chars)
Container Types
| Type | Description |
|---|---|
| Board | PCB/Schematic design (Xpedition or PADS Professional). Supports full preview, BOM extraction, and editor integration. |
| Multi-Board Panel | Panel design containing multiple board instances. |
| Folder | Generic container for any file type. Versioned but without editor integration or preview. |
Accessing Container Operations
Right-click a container in the Containers panel to access all operations:
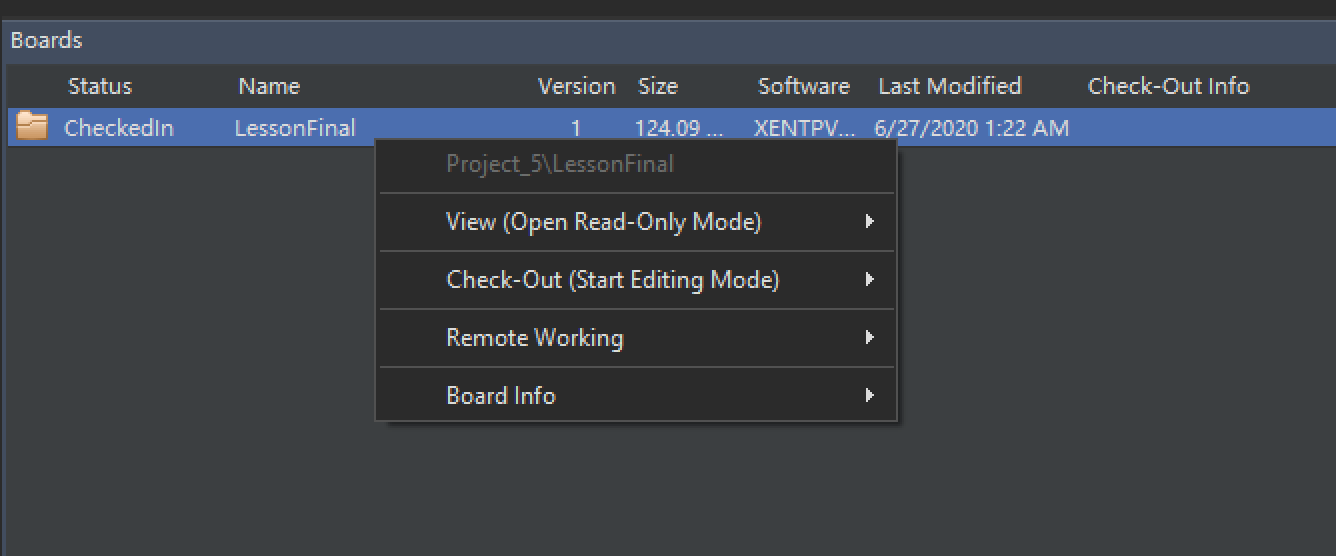
Right-click an empty area in the Containers panel for project-level operations (import):
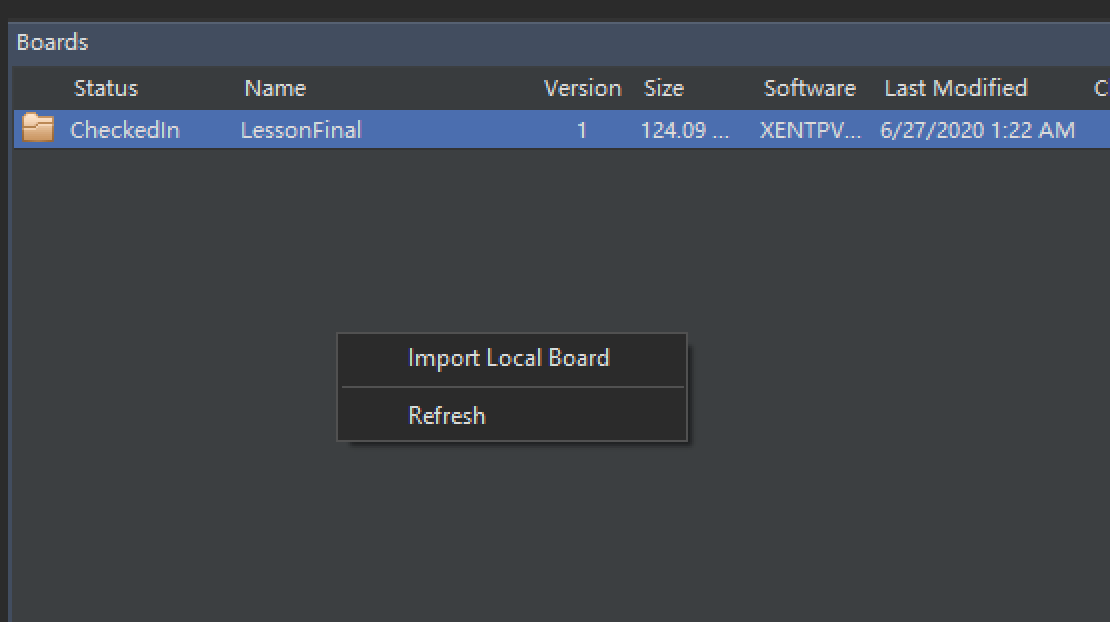
Importing a Container
Requires: Contributor or Manager role.
Import brings an external design into the project as a new container.
Select the target project in the Project Explorer.
Right-click an empty area in the Containers panel.
Click Import Local Container.
In the folder browser, select the root folder of your design:
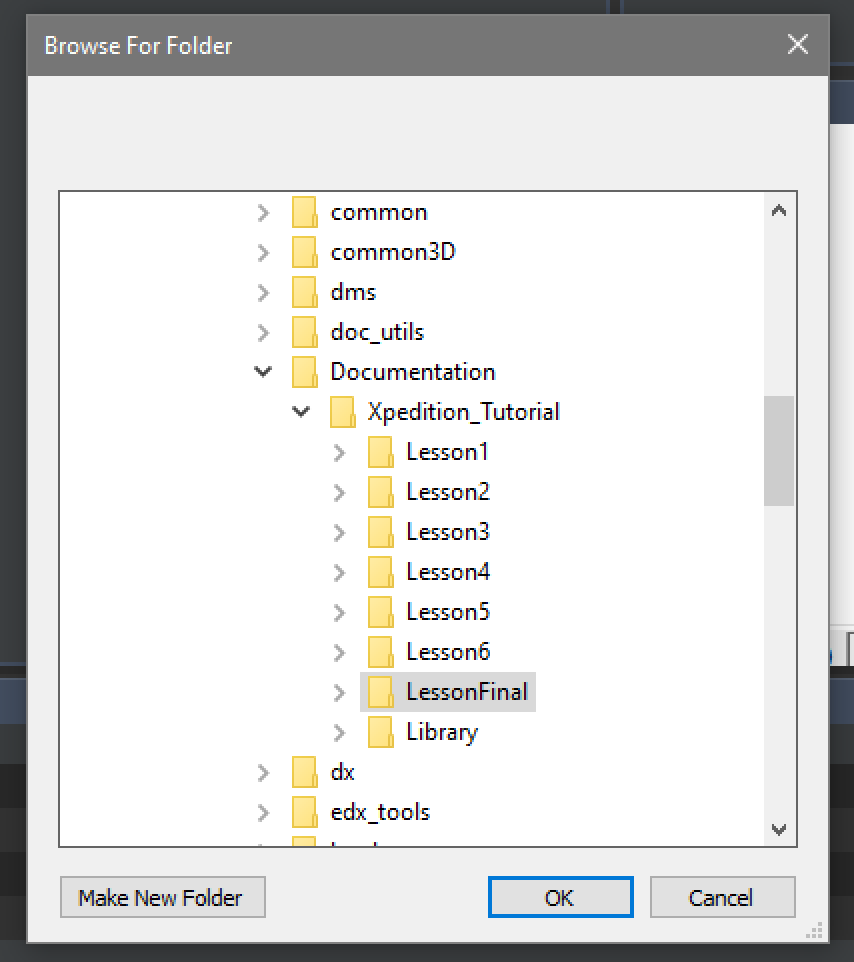
TIP
Select the folder that contains the project/schematic file (e.g., the
.prjfile), not a parent folder.Monitor progress in the Operation Logs panel.
Renaming a Container
Requires: Contributor or Manager role. Container must be checked in.
- Right-click the container.
- Go to Container Info -> Rename.
- Enter the new name and click OK.
Cloning a Container
Requires: Contributor or Manager role. Container must be checked in.
Creates a copy of the container (latest version only) within the same project.
- Right-click the container.
- Go to Container Info -> Clone.
- Enter a name for the copy and click OK.
Deleting a Container
Requires: Manager role. Container must be checked in.
WARNING
Deleting removes the container and all its version history. The data is moved to the server Trash folder.
- Right-click the container.
- Go to Container Info -> Delete.
- Confirm the deletion.
Moving a Container to Another Project
Requires: Manager role in both source and destination projects. Container must be checked in.
Right-click the container.
Go to Container Info -> Move/Copy to Another Project.
In the dialog:
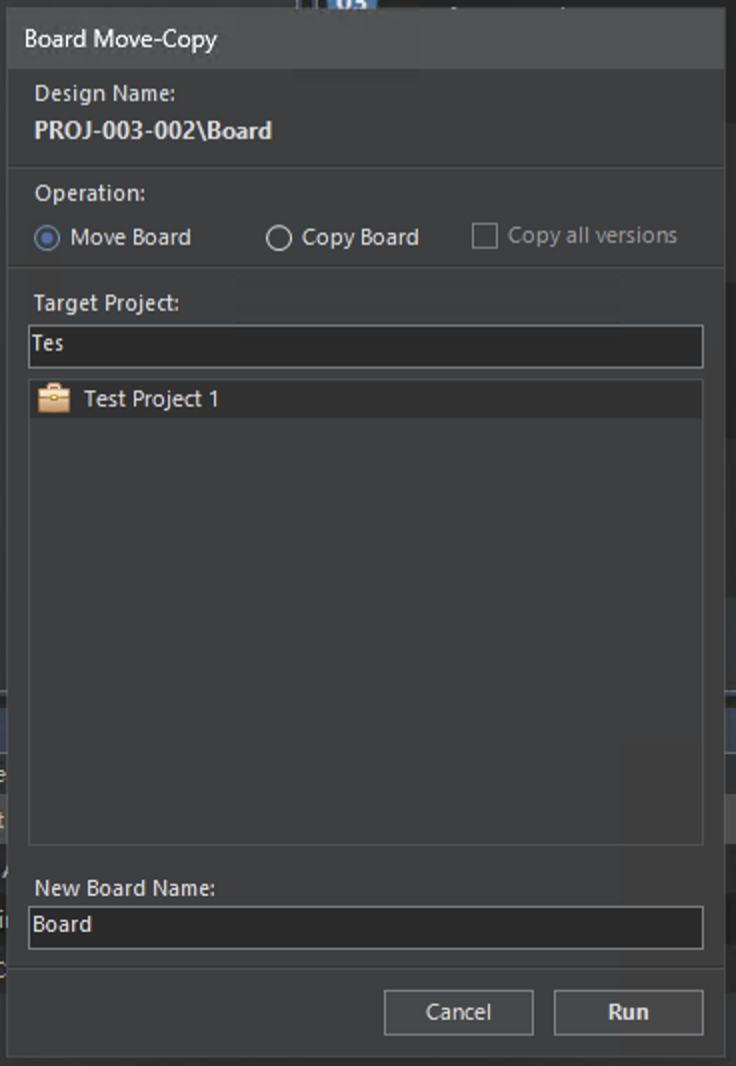
Select Move Container under Operation.
Select the destination project.
Optionally rename the container.
Click OK.
The container is removed from the source project and appears in the destination.
Copying a Container to Another Project
Requires: Contributor or Manager role in the destination project. Container must be checked in.
Right-click the container.
Go to Container Info -> Move/Copy to Another Project.
In the dialog:
Select Copy Container under Operation.
Optionally check Copy all versions to include full history (otherwise only the latest version is copied).
Select the destination project.
Optionally rename the container.
Click OK.
Container States
Containers follow a state machine:
| State | Meaning |
|---|---|
| Checked In | Stored on server. Available for check-out. All operations (rename, clone, delete, move, copy) require this state. |
| Checked Out | A user is actively editing. Locked to that user until check-in or cancel. |
Only the user who checked out a container can check it back in or cancel the check-out. Administrators can force-cancel from the web admin interface.
See Design Operations for check-in/check-out procedures.