

Appearance
Access Control
Starting with version 26.6, EEforce uses a role-based access control (RBAC) system. Each project independently defines who can access it and what they can do.
Roles
Every user or group assigned to a project receives exactly one role:
| Role | Level | Permissions |
|---|---|---|
| Viewer | 1 | Browse projects, open designs in read-only mode, view previews and BOM |
| Contributor | 2 | Everything in Viewer, plus check-out and check-in designs |
| Manager | 3 | Everything in Contributor, plus clone/delete projects, manage members |
A user who is not assigned to a project (and not in an assigned group) has No Access - the project is hidden from them entirely.
INFO
There is no explicit "Admin" role at the project level. System-wide administration is handled through the Project Administrators group (see below).
How Effective Role Is Calculated
When a user accesses a project, the system determines their effective role:
- If the user has a direct assignment -> that role applies.
- If the user belongs to one or more assigned groups -> the highest group role applies.
- The effective role is the maximum of the direct assignment and all group assignments.
- If no assignment matches -> No Access.
Effective Role = max(direct user role, highest matching group role)Example: A user has Viewer assigned directly, but belongs to a group assigned as Contributor. Their effective role is Contributor.
Special System Entities
| Entity | Behavior |
|---|---|
admin | Built-in administrator. Always has full access to everything. |
| Project Administrators | Members have full unrestricted access to all projects, regardless of per-project assignments. |
| Project Creators | Members can create new projects. Does not grant access to existing projects. |
Assigning Access
From the Desktop Client
Right-click a project -> Properties.
The role assignment panel shows current assignments:
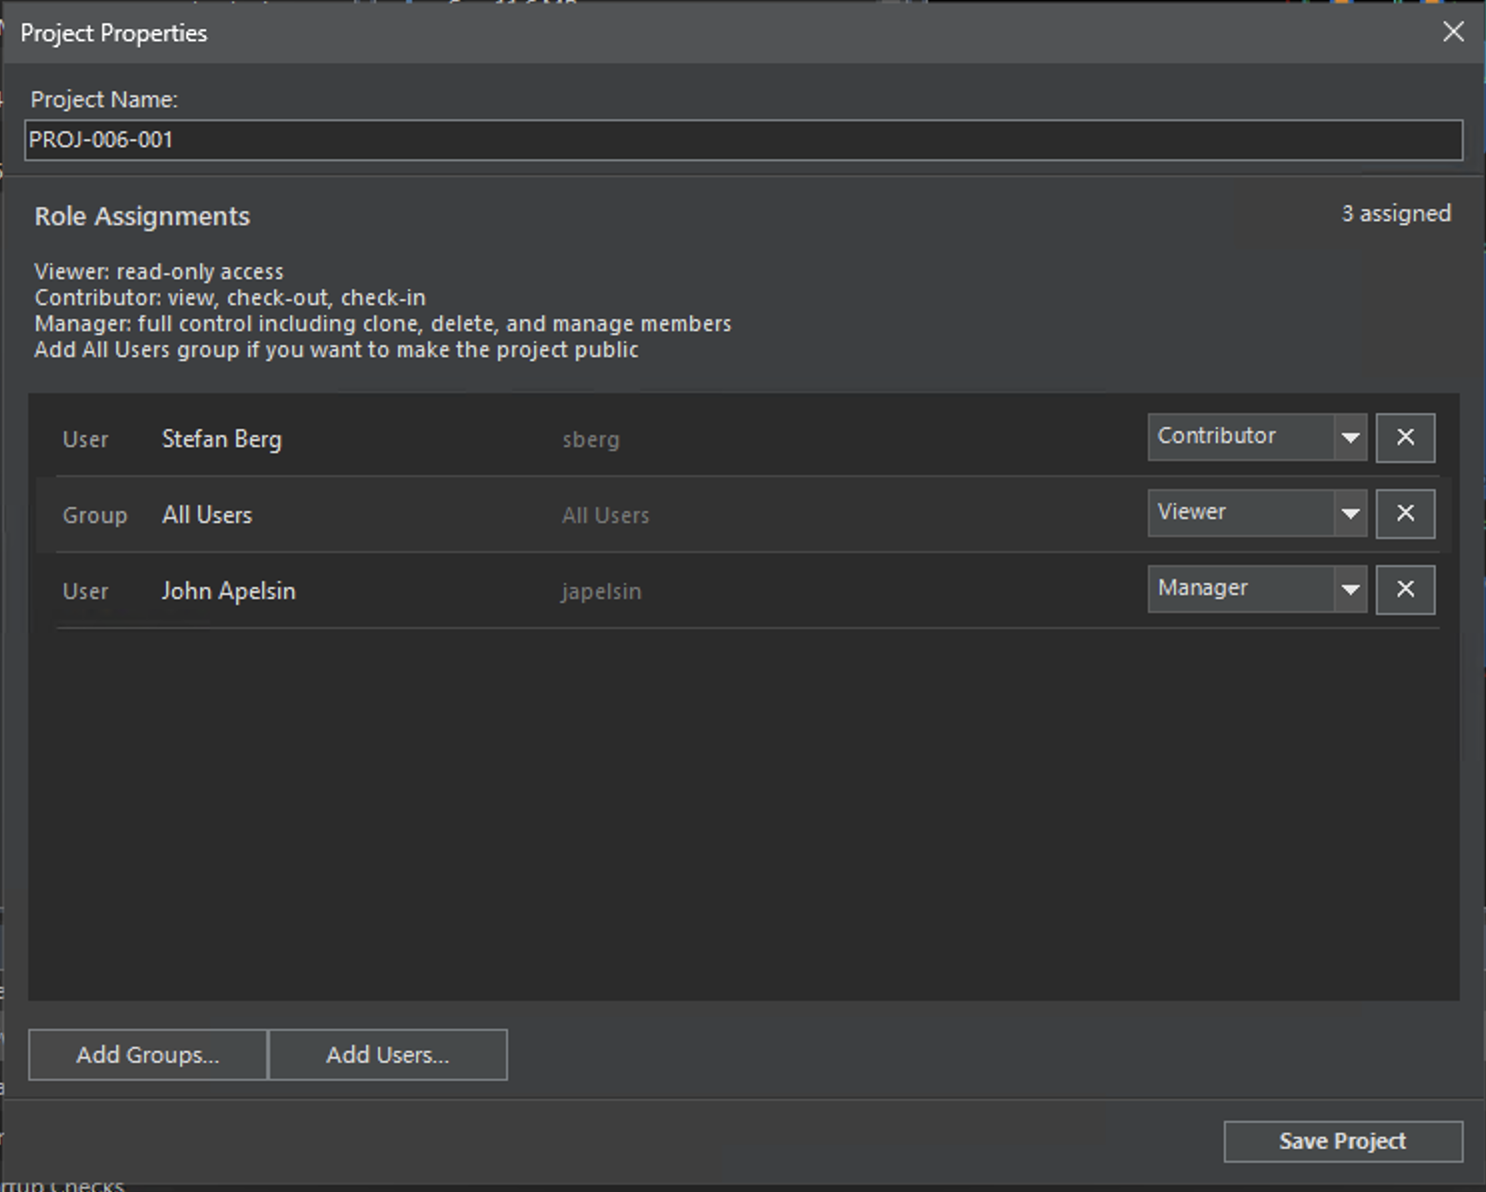
Click Add Groups... or Add Users... to add new entries.
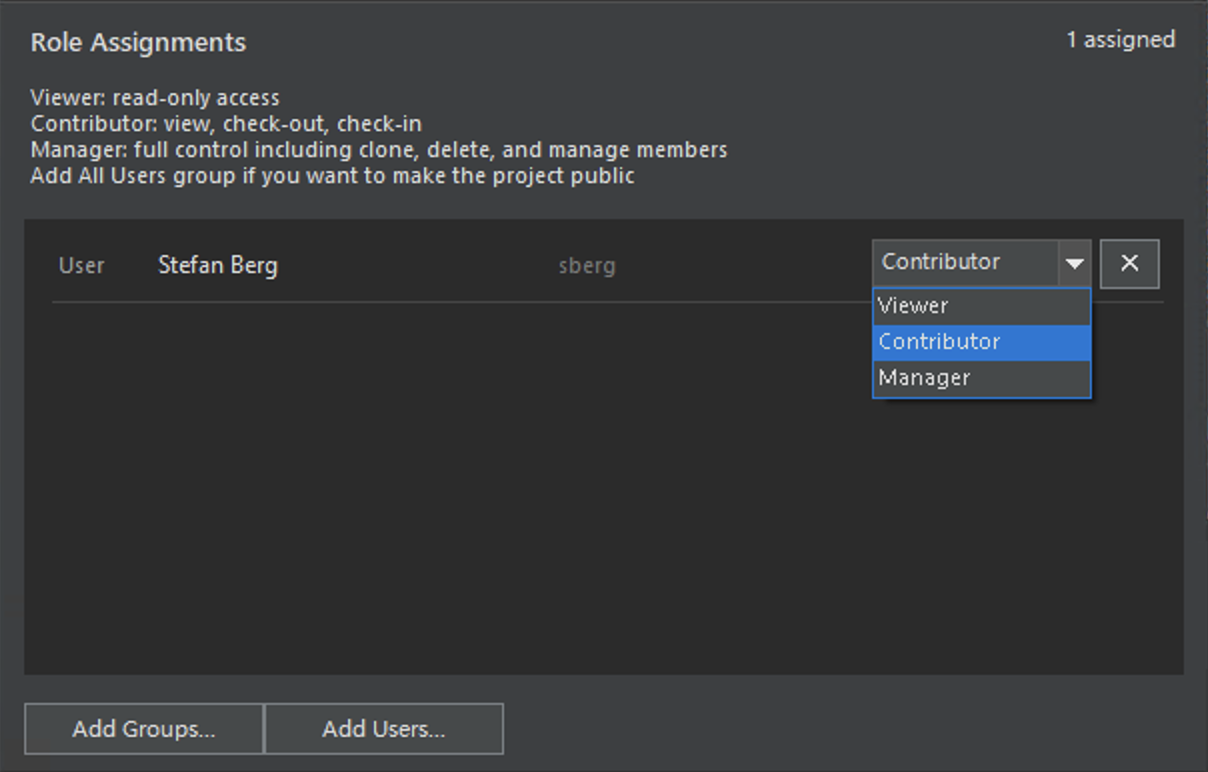
Set the role dropdown for each entry.
To remove access: set the role to No Access.
Click Save Properties.
From the Web Admin Interface
Navigate to Admin -> Project Management.
Select a project from the list.
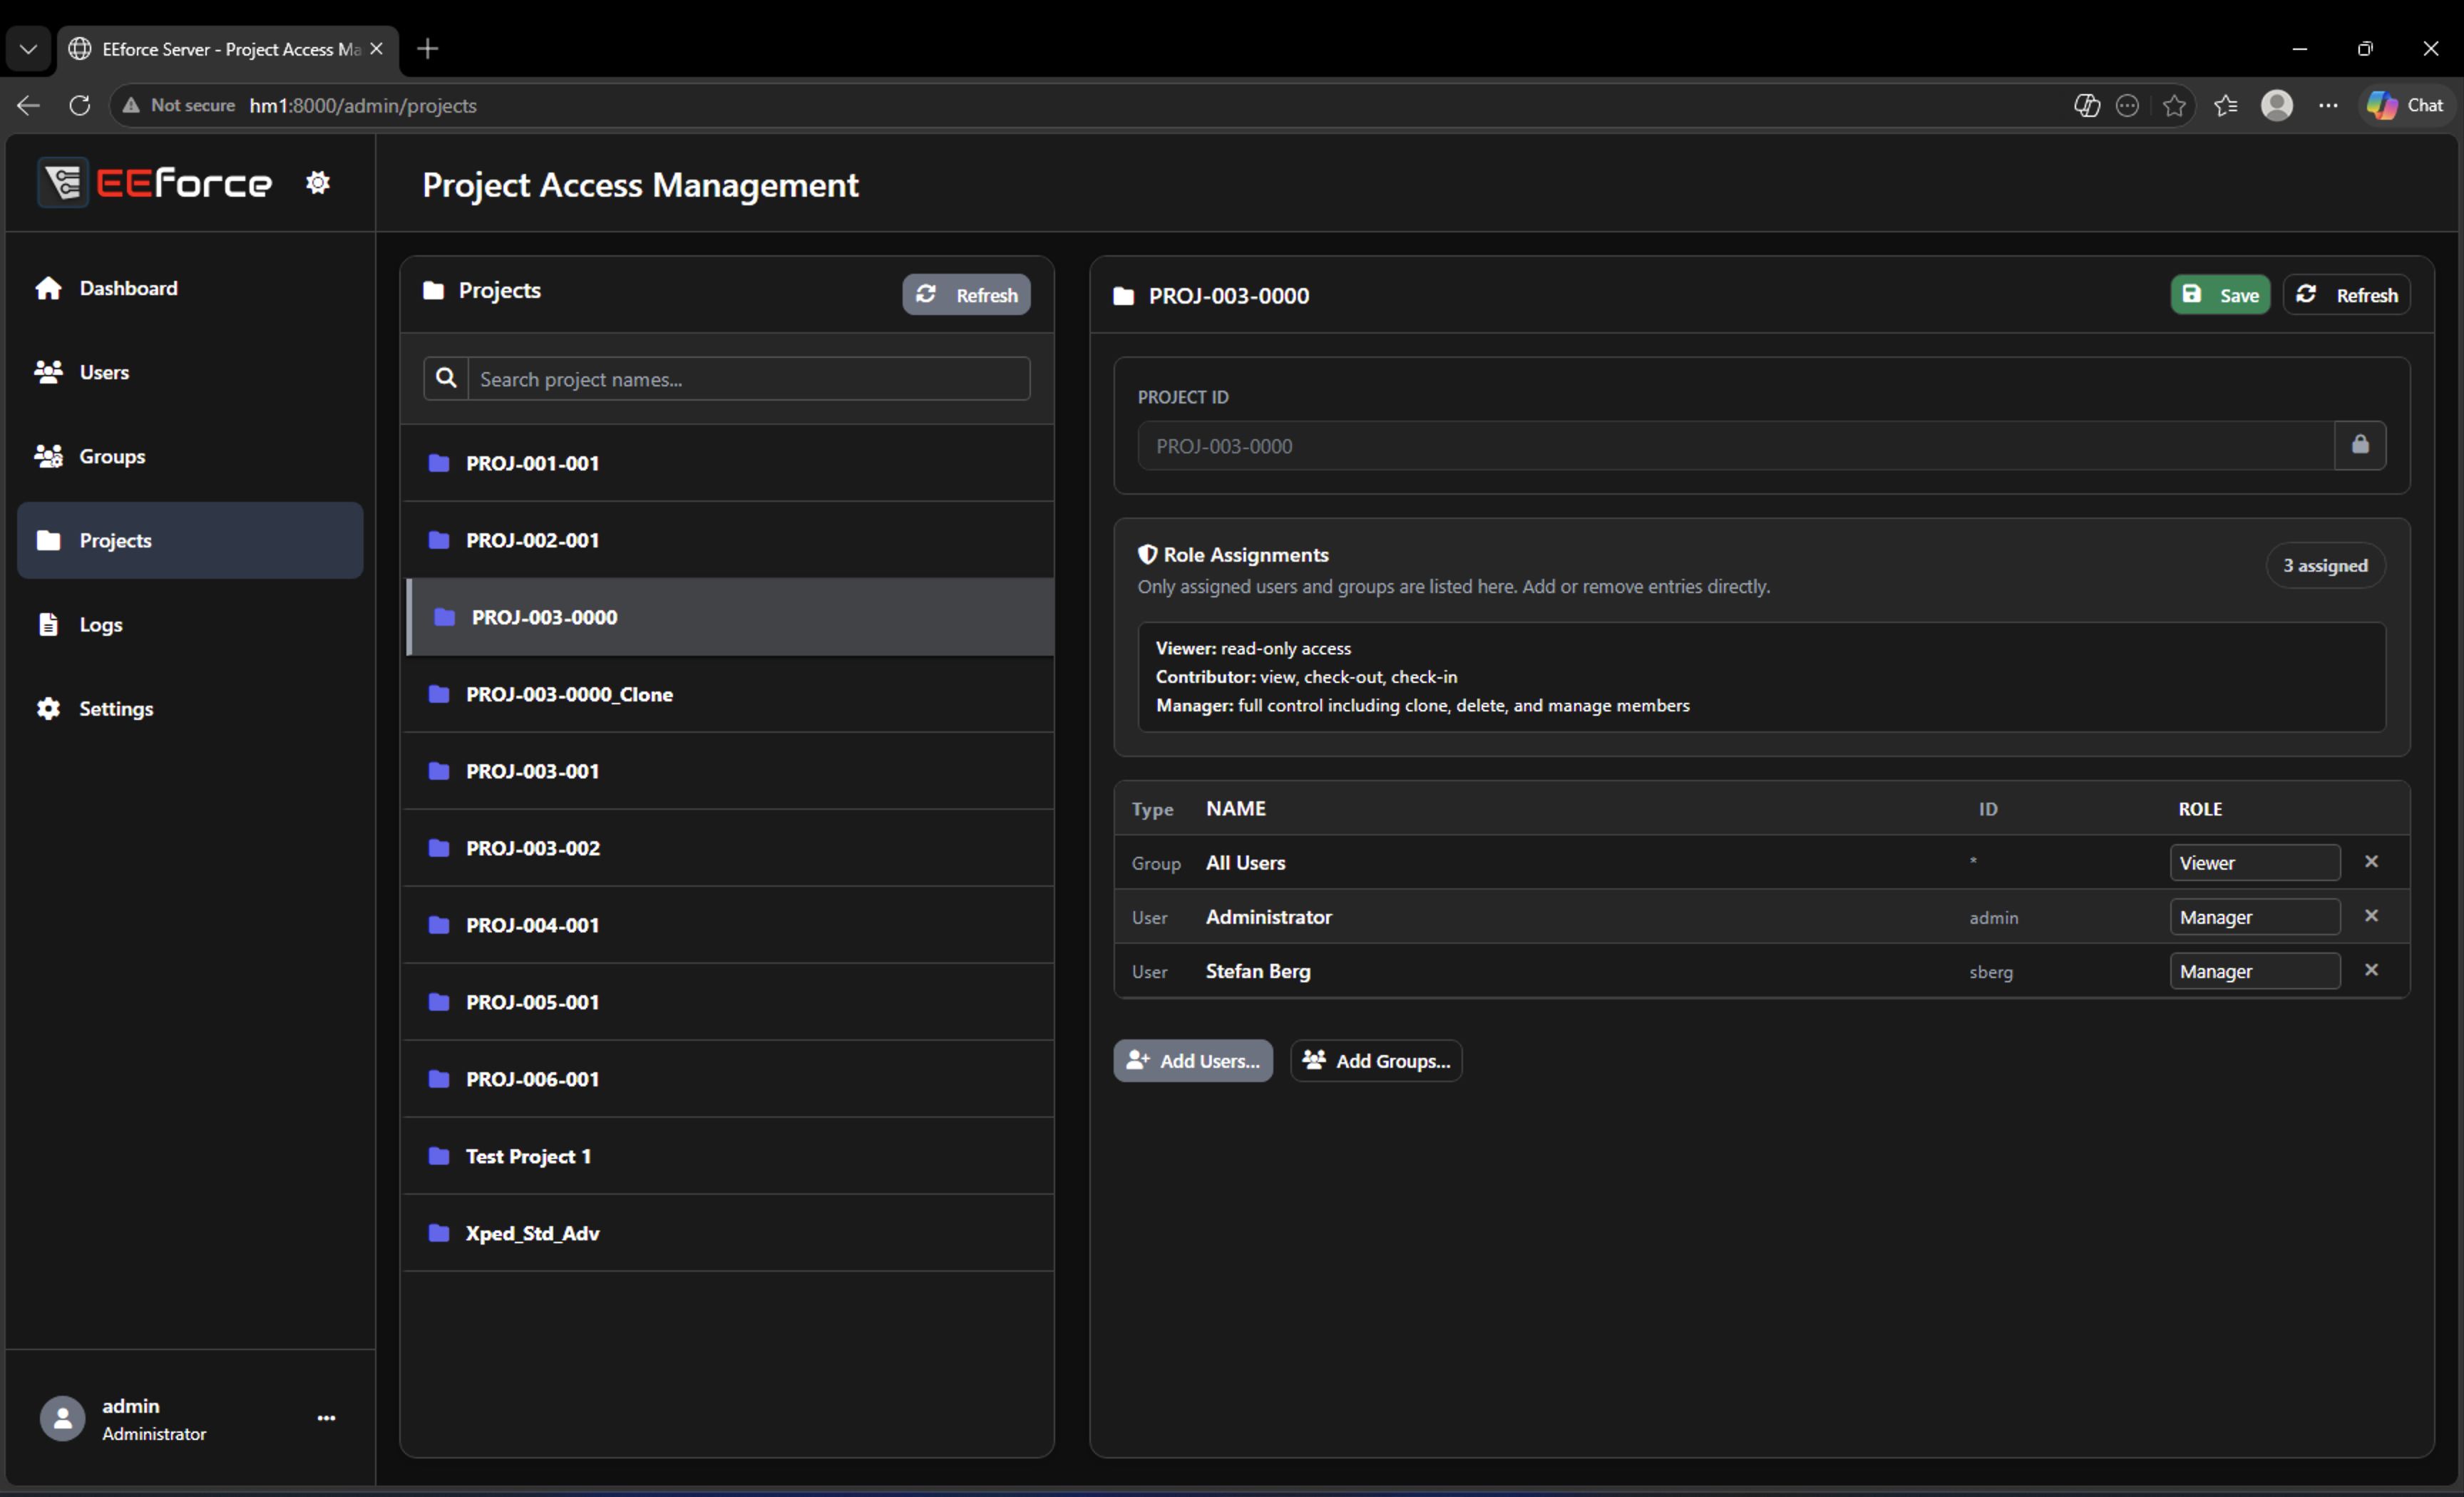
Modify role assignments in the detail panel.
Click Save.
Making a Project Public
To make a project accessible to all authenticated users, assign the All Users group:
| Goal | Configuration |
|---|---|
| Everyone can view | All Users -> Viewer |
| Everyone can edit | All Users -> Contributor |
| Private project | Do not assign "All Users" |
Individual and group assignments override the All Users role when they grant a higher level. For example, if All Users is Viewer but a specific user is assigned Manager, that user has Manager access.
Security Rules
- Only Managers (or Project Administrators) can modify a project's access list.
- The SuperUser role (level 4) is assigned internally to members of Project Administrators and the built-in
adminaccount.
Legacy Projects
Projects created before version 26.6 used a simpler access model (binary allowed/not-allowed). These projects are handled as follows:
| Old State | New Behavior |
|---|---|
| User/group was in the access list | Shown with Manager role (preserves full access) |
| Project was "visible to all" (public) | Shown with All Users -> Viewer (read-only indicator) |
TIP
Legacy assignments are display-only until you explicitly edit and save. Once saved, the project fully adopts the new role model.
To migrate a legacy project:
- Open Project Properties.
- Review the auto-assigned roles.
- Adjust roles as needed.
- Click Save Properties - the project now uses the new model exclusively.
Batch Updates
The Batch Project Updater applies role changes across multiple projects simultaneously.
- Open the Batch Project Updater (Project Administrators only).
- Select target projects from the list.
- Configure the role assignments you want to apply.
- Check Override role assignments to replace all existing assignments on the selected projects with the new set.
- Click Apply.
WARNING
Override mode removes all existing role assignments on the selected projects and replaces them with the assignments you configured. This cannot be undone.