

Appearance
SSO Integration (Single Sign-On)
EEforce supports Single Sign-On using the OpenID Connect (OIDC) protocol. This allows users to authenticate through an external Identity Provider (IdP) such as Keycloak, Azure AD (Entra ID), Okta, or any OIDC-compliant provider.
Overview
With SSO enabled:
- Users click Sign in with SSO on the login screen
- A browser window opens to the identity provider's login page
- After successful authentication, the user is automatically logged into EEforce
- User accounts are provisioned automatically on first SSO login
Authentication Flow
1. User clicks "Sign in with SSO" in EEforce Client
2. Browser opens to Identity Provider login page
3. User authenticates with IdP (username/password, MFA, etc.)
4. IdP redirects back to EEforce with an authorization code
5. EEforce exchanges code for tokens (ID token + access token)
6. EEforce extracts user identity from the token
7. If user is new -> account is created automatically
8. User is logged in
Protocol
EEforce uses the Authorization Code flow (OAuth 2.0 / OIDC). The client application starts a local HTTP listener to receive the redirect callback.
Prerequisites
Before configuring SSO in EEforce, you need:
- An OIDC-compliant Identity Provider (Keycloak, Azure AD, Okta, Auth0, etc.)
- A client application registered in your IdP with:
- Client ID and Client Secret
- Redirect URI set to
http://localhost:8001/(for desktop client callback) - Authorization Code grant type enabled
- Required scopes:
openid,profile,email
Configuration
SSO is configured exclusively from the Web Admin Interface.
- Navigate to
http://<server>/Admin - Go to Settings -> SSO Settings tab
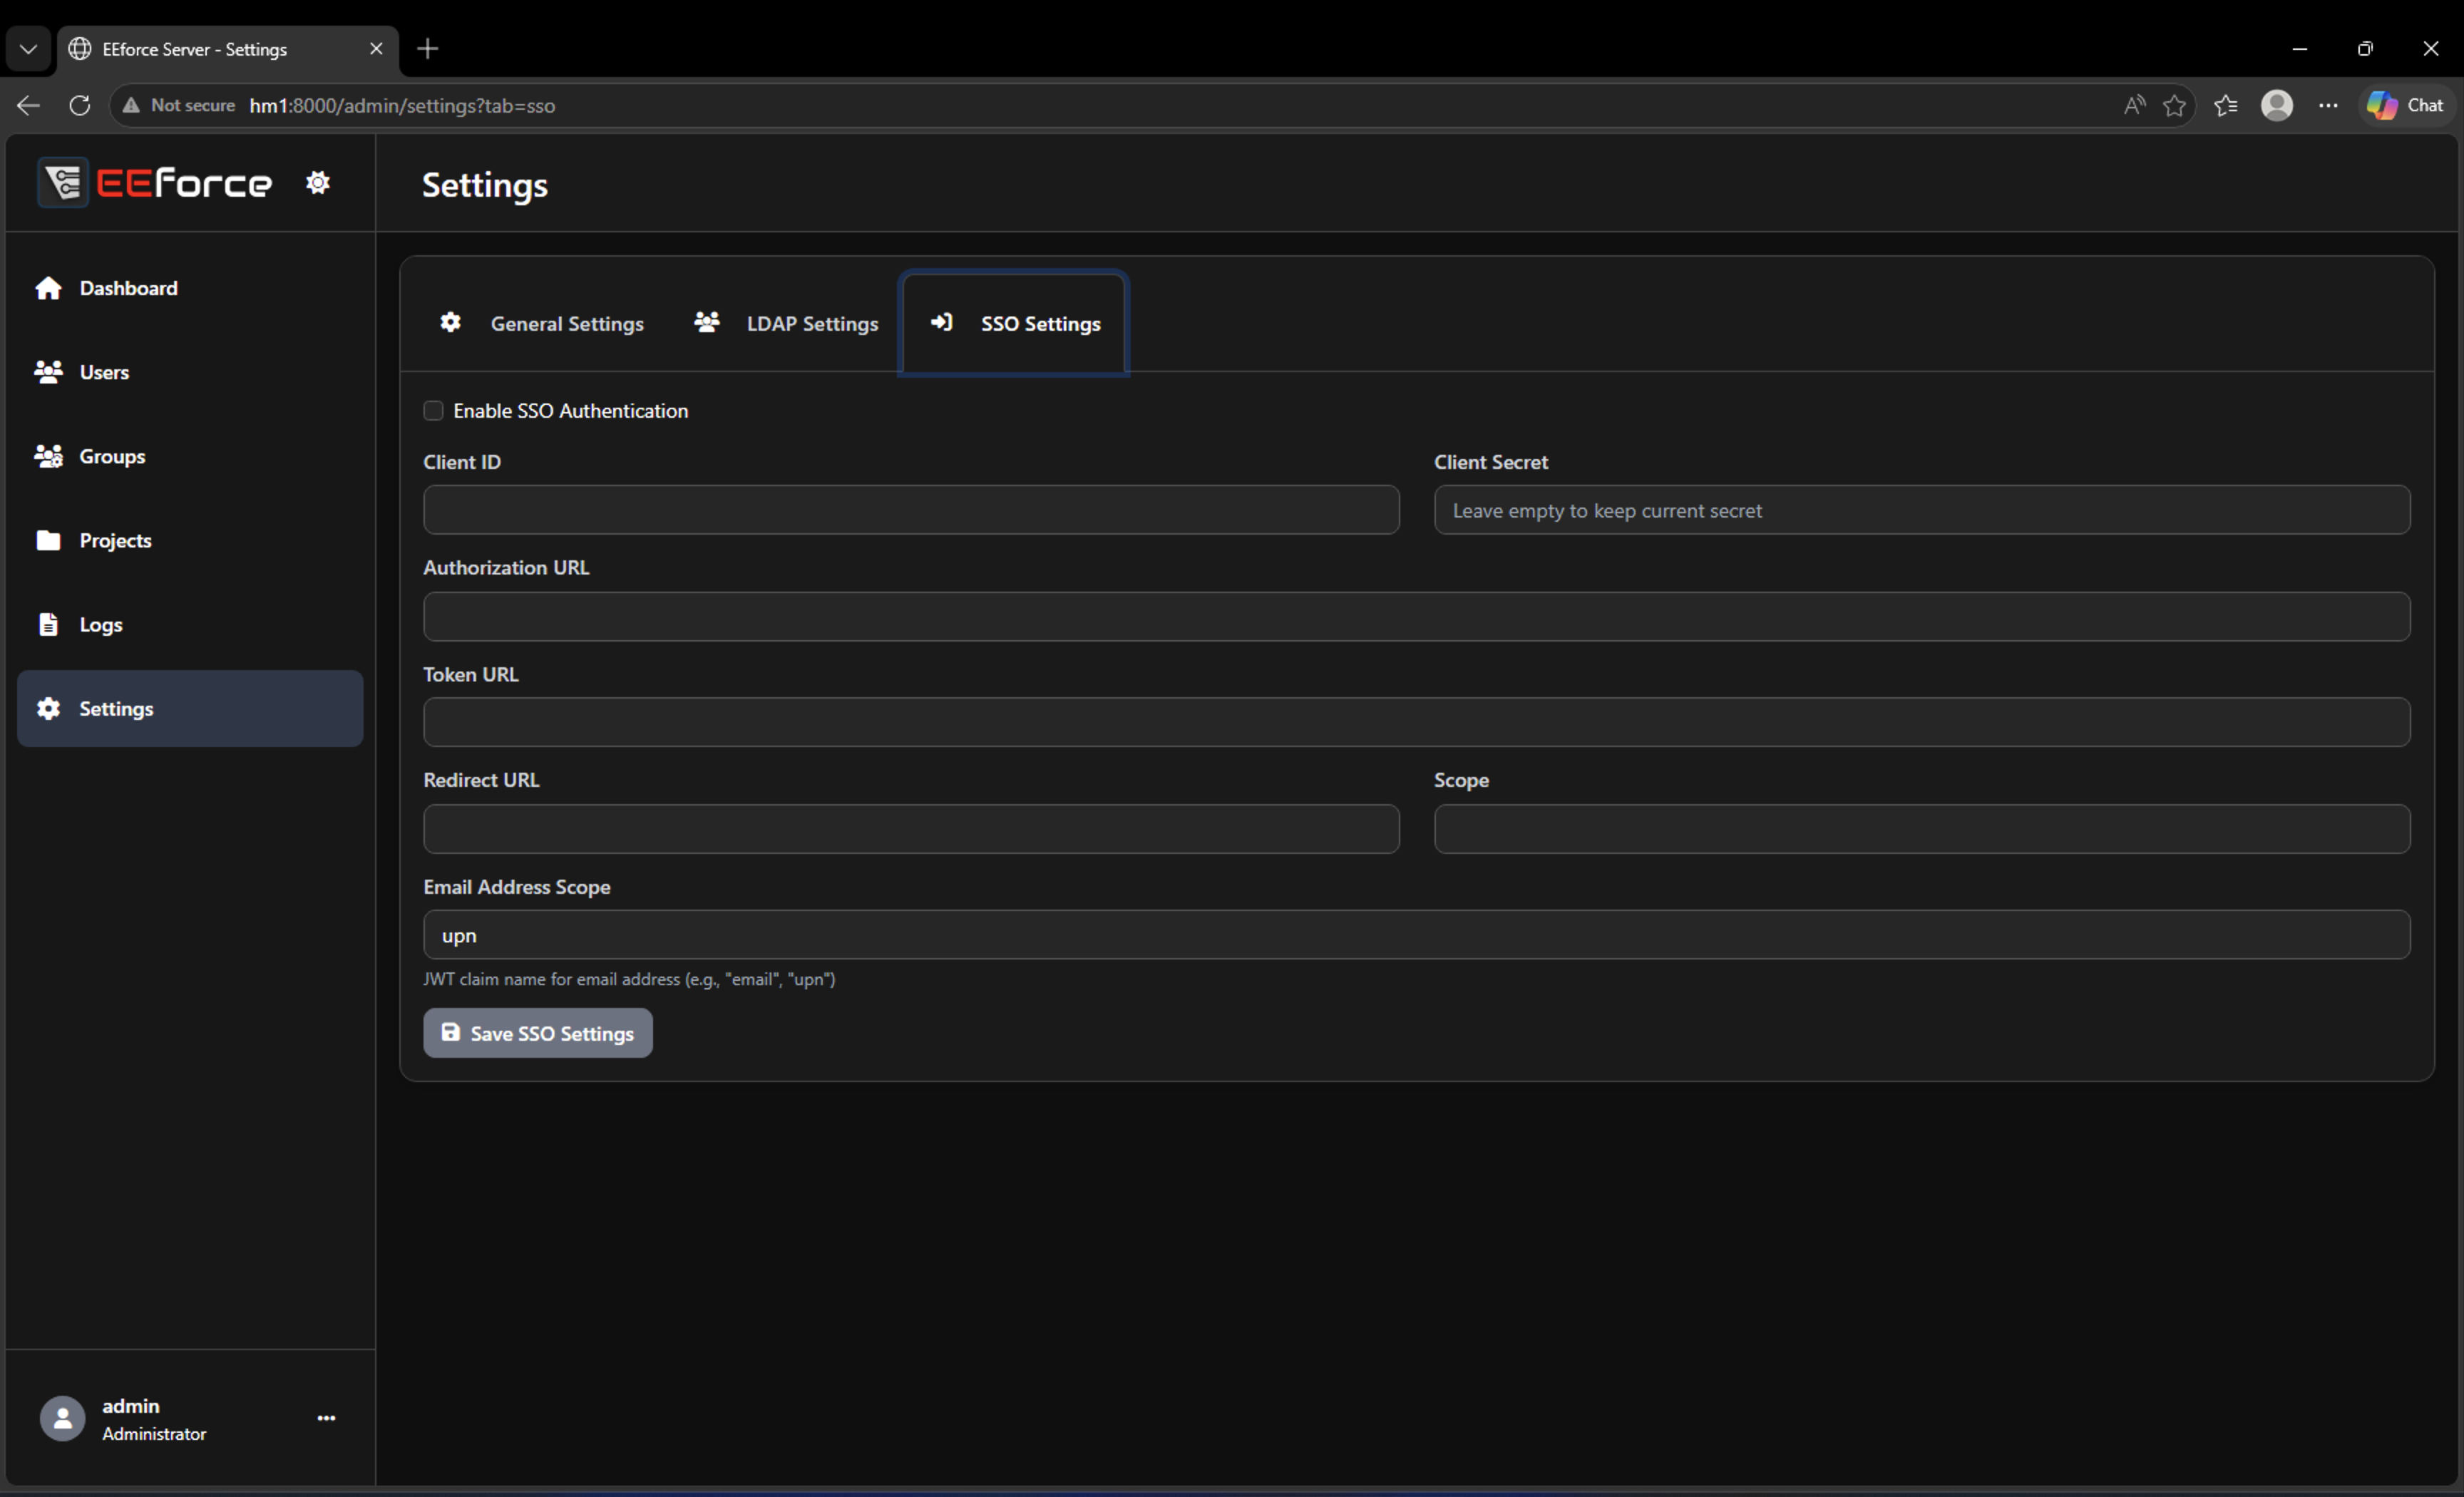
Settings Reference
| Setting | Description | Example |
|---|---|---|
| Enable SSO Authentication | Master switch for SSO functionality | Checked/Unchecked |
| Client ID | The OAuth client ID registered with your IdP | eeforce_production |
| Client Secret | The OAuth client secret | (stored securely) |
| Authorization URL | IdP's authorization endpoint | https://idp.example.com/auth |
| Token URL | IdP's token endpoint | https://idp.example.com/token |
| Redirect URL | Callback URL (must match IdP configuration) | http://localhost:8001/ |
| Scope | OIDC scopes to request | openid profile email |
| Email Address Scope | JWT claim name for the user's email/identifier | upn or email |
Setup Guide
Step 1: Register EEforce in Your Identity Provider
Keycloak Example
- Open Keycloak Admin Console
- Select your realm
- Go to Clients -> Create Client
- Set:
- Client ID:
eeforce - Client Protocol:
openid-connect - Access Type:
confidential - Valid Redirect URIs:
http://localhost:8001/*
- Client ID:
- Save and note the Client Secret from the Credentials tab
Azure AD (Entra ID) Example
- Open Azure Portal -> Azure Active Directory -> App registrations
- Click New registration
- Set:
- Name:
EEforce - Redirect URI:
http://localhost:8001/(type: Public client/native)
- Name:
- After creation, go to Certificates & secrets and create a new client secret
- Note the Application (client) ID and Client Secret
- Find your endpoints under Endpoints:
- Authorization URL:
https://login.microsoftonline.com/{tenant-id}/oauth2/v2.0/authorize - Token URL:
https://login.microsoftonline.com/{tenant-id}/oauth2/v2.0/token
- Authorization URL:
Okta Example
- Open Okta Admin -> Applications -> Create App Integration
- Select OIDC - OpenID Connect and Native Application
- Set:
- Sign-in redirect URI:
http://localhost:8001/ - Grant type: Authorization Code
- Sign-in redirect URI:
- Note the Client ID and Client Secret
Step 2: Configure EEforce
- Open Web Admin -> Settings -> SSO Settings
- Check Enable SSO Authentication
- Fill in:
- Client ID and Client Secret from your IdP
- Authorization URL - the IdP's
/authorizeendpoint - Token URL - the IdP's
/tokenendpoint - Redirect URL:
http://localhost:8001/ - Scope:
openid profile email - Email Address Scope:
email(orupnfor Azure AD)
- Click Save SSO Settings
Step 3: Test
- Open the EEforce Client
- On the login screen, click Sign in with SSO
- A browser window should open to your IdP's login page
- Log in with valid credentials
- The browser should show "You are logged in" and close automatically
- The EEforce Client should now be authenticated
User Provisioning
When a user authenticates via SSO for the first time:
- EEforce creates a new user account using information from the ID token:
- User ID -> Subject claim (
sub) - Display Name -> Name claim (
name) - Email -> Claim specified by Email Address Scope setting
- User ID -> Subject claim (
- The account is marked as SSO-authenticated
- The user is added to the system and can be assigned to groups/projects normally
INFO
SSO users cannot change their password in EEforce - authentication is always delegated to the Identity Provider.
Client Experience
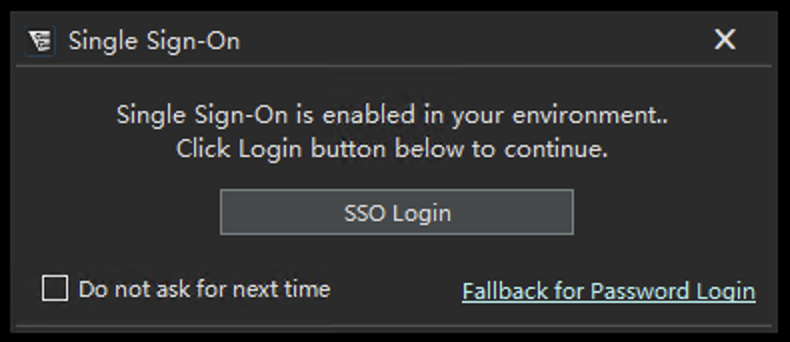
The login screen shows an SSO button when SSO is enabled on the server. Users can also check Remember me to enable automatic SSO login on subsequent launches (skips the login dialog).
Automatic SSO Login
When enabled (via the "Remember" checkbox), the client will:
- Skip the login dialog on next launch
- Automatically open the browser for SSO authentication
- Complete login without user interaction (if IdP session is still valid)
Combining SSO with Local and LDAP Authentication
SSO, LDAP, and local authentication can coexist:
| User Type | How They Log In |
|---|---|
| Local users | Username + password in login dialog |
| LDAP users | AD credentials in login dialog |
| SSO users | Click "Sign in with SSO" button |
A single EEforce instance can have a mix of all three user types.
Security Considerations
| Aspect | Recommendation |
|---|---|
| Client Secret | Store securely; never share in plain text |
| Redirect URI | Use http://localhost:8001/ (local loopback only) |
| Token validation | EEforce validates the JWT signature and expiration |
| HTTPS | Use HTTPS for all IdP endpoints |
| Session duration | Controlled by EEforce's token expiry, independent of IdP session |
Troubleshooting
| Issue | Possible Cause | Resolution |
|---|---|---|
| Browser opens but login fails | Incorrect Authorization URL | Verify the URL matches your IdP's OIDC discovery document |
| ""Authorization code is missing"" | Redirect URI mismatch | Ensure the redirect URI in EEforce matches exactly what's configured in the IdP |
| User created with wrong ID | Wrong claim mapped | Check Email Address Scope setting (try email, upn, or preferred_username) |
| ""Error: invalid_client"" | Wrong Client ID or Secret | Verify credentials match the IdP's client configuration |
| Browser shows error from IdP | Grant type not allowed | Ensure Authorization Code flow is enabled for the client in the IdP |
| SSO button not showing | SSO not enabled on server | Enable SSO in Web Admin -> Settings -> SSO Settings |
| Auto-login not working | Remember not checked; or IdP session expired | Re-check remember option; re-authenticate with IdP |