
Appearance
Server Installation and Configuration
Prerequisites and Recommendations
- License File: A valid license file specifically prepared for the server machine.
- Supported Operating Systems: Windows Server 2022 and 2025 (Core, Essentials, and Data Center editions), Windows 10/11 LTSC, Pro, and Enterprise editions.
- Storage: At least 20GB of available disk space is required, preferably on a local disk. A mapped network location may also be used. The required space depends on your usage and design sizes. NVMe or SSD drives with enterprise-grade durability are recommended. Consider RAID 10 for redundancy and performance if applicable.
- RAM: At least 4GB of free RAM when idle is recommended.
- Backup: A Windows shadow backup solution or a comparable third-party backup solution is recommended.
- Network: A reliable LAN connection between the server and client machines is recommended.
- SWAP: 4GB of swap space is recommended.
- CPU: 4 vCPUs are recommended.
Using the Installer
The Server Installer provides a robust, step-by-step installation process. You may follow the on-screen instructions or refer to the steps below.
Installation Steps:
Download the latest installation package from our Support Portal. Installation files are provided as ZIP packages, such as Server_25.5.zip. Version numbers may vary.
Extract the ZIP file to a convenient folder.
The extracted folder should appear as follows:
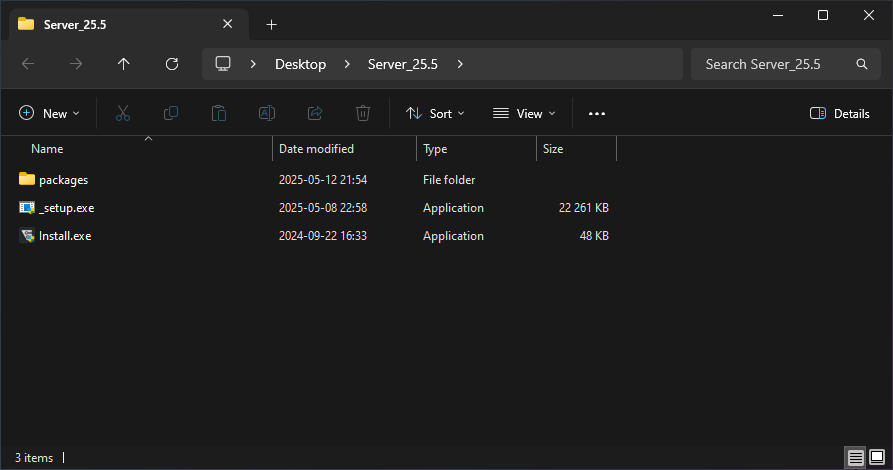
Run Install.exe. If prompted by Windows for permission, allow access.
You should see a welcome window similar to this:
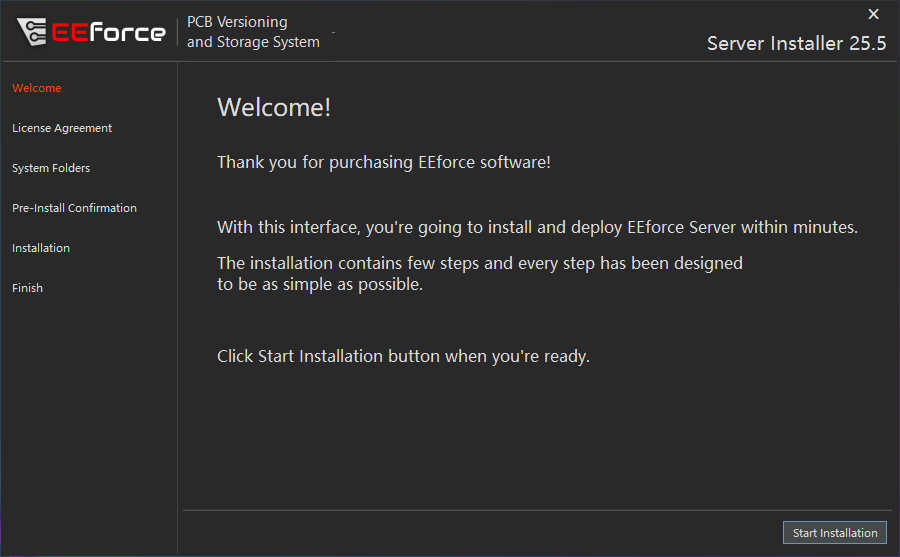
Click the Start Installation button.
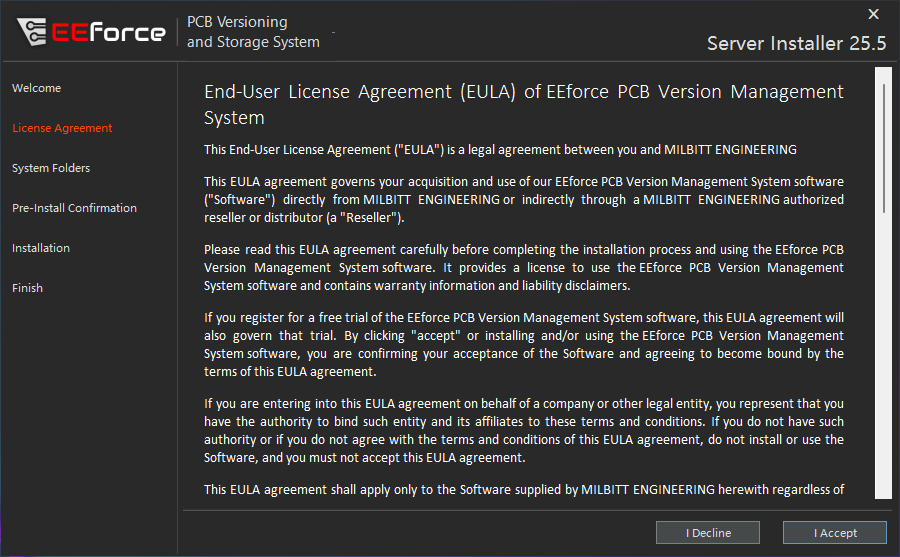
The End User License Agreement will be displayed. Please read it carefully and click I Agree to proceed. Note that accepting the License Agreement is a legally binding action.
After accepting the agreement, the System Folders configuration form will appear:
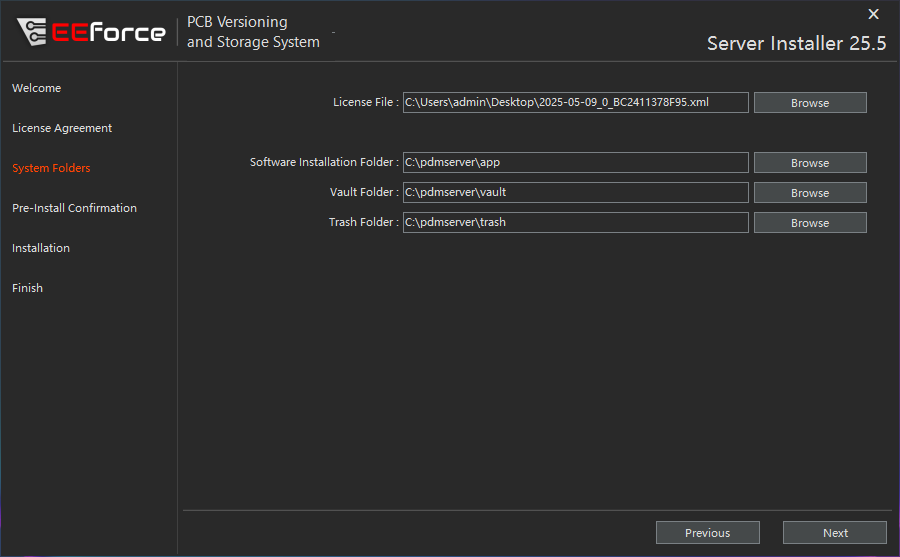
- License File: The license file authorizes the software to run on this computer. Obtain a valid license file from your authorized reseller.
- Software Installation Folder: This folder stores the software executables. It is strongly recommended to create a folder on your local hard drive for this purpose. Required space is less than 150MB.
- Vault Folder: This folder stores design files. Allocate at least 20GB of space for the Vault. The folder may reside on a network path, but it must be within a mapped drive. Read and write speeds are important; lower speeds can impact check-out/check-in performance. Set up regular backups for this folder. Windows shadow copy is recommended.
- Trash Folder: Deleted design files are moved to the Trash folder rather than being permanently deleted. This safety feature helps prevent data loss. Allocate at least 5GB of storage for the Trash folder and perform regular manual cleanups.
All fields on this page must be completed. After installation, you can modify folder paths and user lists by editing the config.json file in the installation folder.
When finished, click the Next button.
The next screen is a final confirmation before installation begins. Review the information you entered on the previous screen.
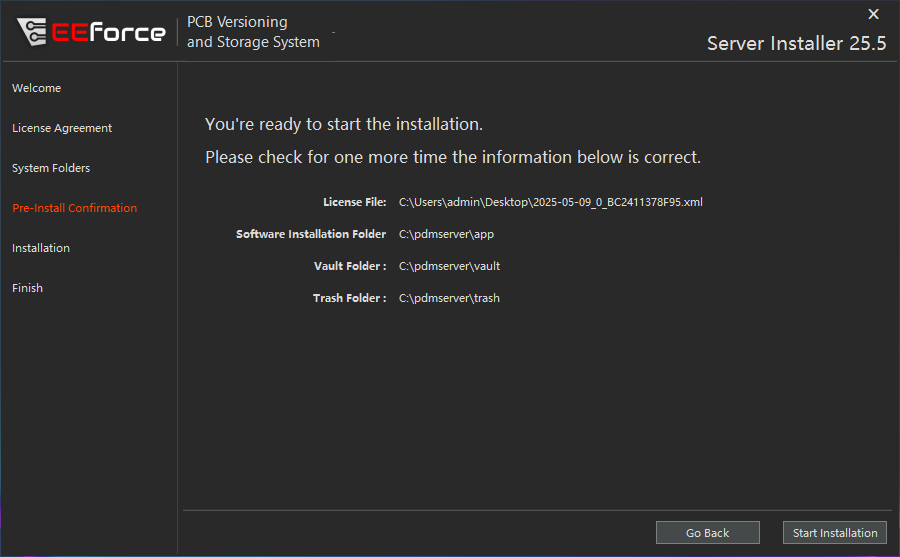
If all information is correct, click the Start Installation button.
The installer will now create the necessary folders, install required Windows packages, and deploy the IIS server. Please allow the installer to complete this process. Upon completion, the final page will be displayed.
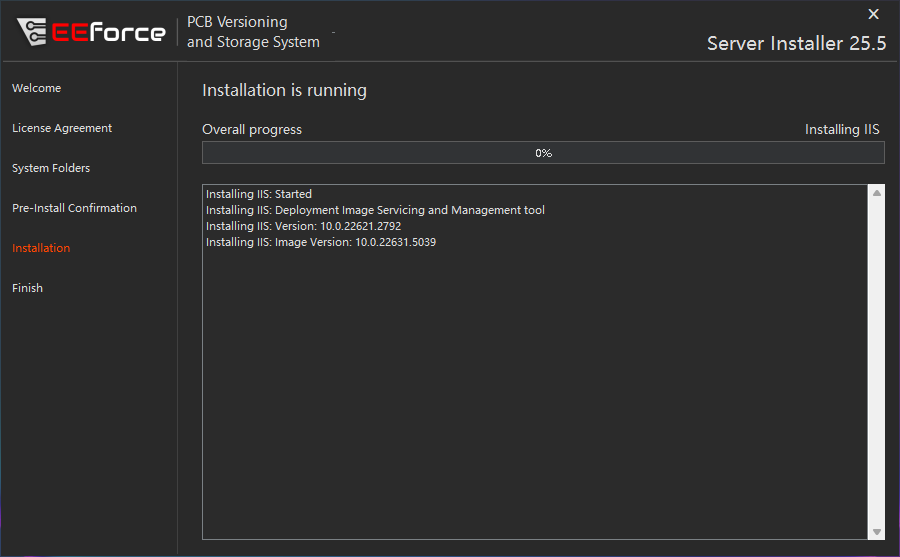
When installation is complete, a confirmation page will be shown. If you see this page, the server has been installed and is operational.
Note the server address provided. You may now close the installation window and begin using the server. Refer to the following section for post-installation administration details.
Starting and Stopping the Server
The EEforce Server operates as an IIS (Internet Information Services) application. You can start or stop the server using the IIS Manager graphical interface:
Using IIS Manager (UI)
Open IIS Manager:
- Press
Windows + R, typeinetmgr, and press Enter.
Or- Search for Internet Information Services (IIS) Manager in the Start menu and open it.
- Press
Locate Your Server Application:
- In the left panel (Connections), expand your server name.
- Click on Application Pools to view all application pools.
- Locate the application pool used by EEforce Server (e.g.,
EEforceApplicationPool).
Start or Stop the Server:
- Right-click the relevant application pool.
- Select Start to run the server, or Stop to shut it down.
Keep in Mind:
Stopping the application pool or site will make the EEforce Server unavailable to users until it is started again.
Using Command Line (CLI)
For Windows Server Core users or those who prefer the command line, the EEforce Server can be managed using PowerShell or the appcmd utility.
Using PowerShell
Start EEforce Server:
powershell
Start-WebAppPool -Name "EEForceApplicationPool"Stop EEforce Server:
powershell
Stop-WebAppPool -Name "EEForceApplicationPool"Changing Server Settings after Installation
config.json
Directory paths used for storage are defined in the config\config.json file within the application directory. You can edit this file to change the locations of the vault and trash folders. The file is in JSON format and can be modified with any text editor.
json
{
    "Configurations": {
        "VaultFolder": "C:\\pdmserver\\vault", // Vault folder location
        "TrashFolder": "C:\\pdmserver\\trash", // Trash folder location
        "UseNTLMAuth": false // Legacy, do not modify
    }
}
After changing folder paths, you must restart the EEForce Server instance using Internet Information Services (IIS) Manager. Refer to the section above for instructions.
Relocating Storage
- To relocate storage folders, first stop the EEForce Server.
- Move your vault folder to the desired location and update the config.json file to reflect the new path.
Setting Vault Permissions
If you use a network drive for storage folders or manually relocate them, you must grant the IIS Application Pool User (IIS_APPPOOL\EEforceApplicationPool) full permissions for these folders. 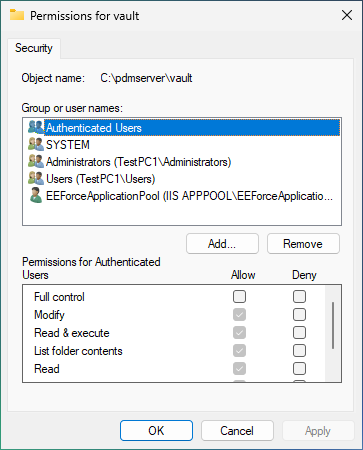
SSL Certificate
EEforce does not manage SSL certificates directly. SSL/TLS termination and certificate management are handled by the reverse proxy (IIS). System administrators should add and manage SSL certificates in IIS as needed. It is recommended to use a certificate from a trusted authority. Self-signed certificates may be used if they are also installed on client machines.
Your IIS site should now be accessible via HTTPS using the installed SSL certificate.