
Appearance
Client Installation and Configuration
Prerequisites and Recommendations
- Supported operating systems: Windows 10 x64, Windows 11 x64.
- Admin privileges are required to install the software.
- Network: A reliable LAN connection between the server and client machines is recommended.
- Storage: At least 4GB of available disk space is recommended in a local disk. NVMe or SSD drives are recommended.
Using the Installer
The Client Installer has been developed to provide a robust step-by-step installation experience. You can follow the instructions in the software or as listed below.
Installation Steps:
Obtain the latest version of the installation package either from our Support Portal or your IT department. We publish installation files in ZIP package format with names like Client_25.5.zip. Version numbers may be different than the example here.
Extract the ZIP file to a convenient folder.
The extracted folder should contain the following files:
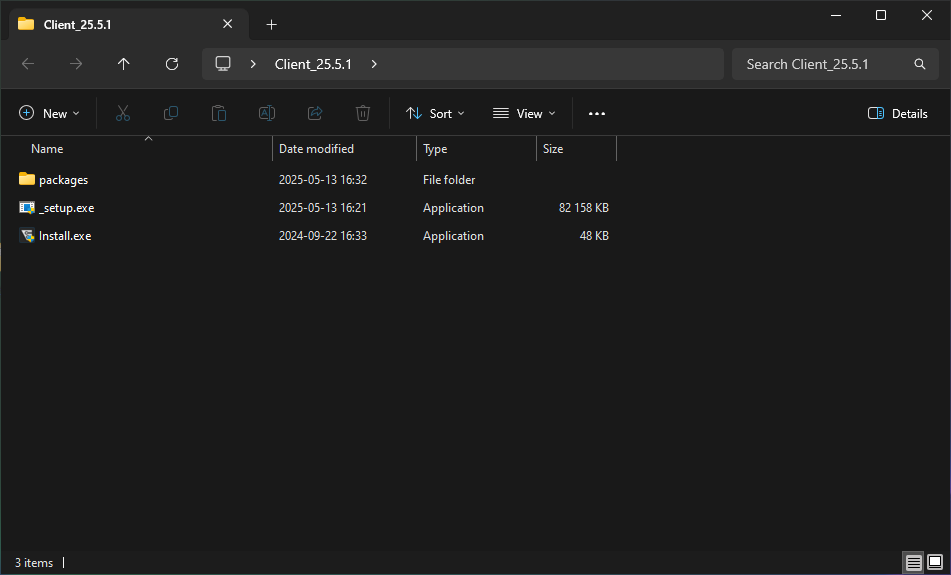
Run Install.exe. If prompted by Windows, grant the necessary permissions.
The installer will check for the required runtimes are installed. If any are missing, the installer will try to install them automatically. This may take some time, depending on your system configuration and the number of packages to be installed.
The welcome window should appear:
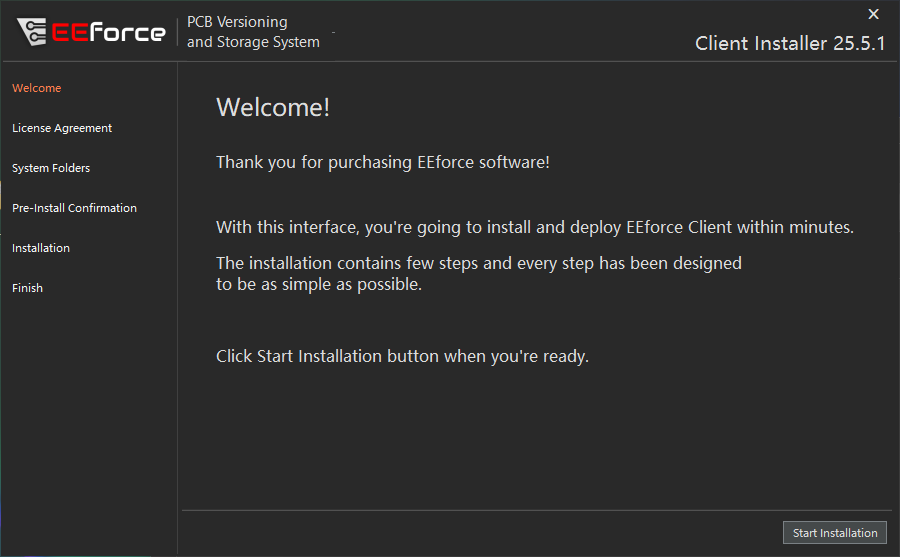 7. Click the Start Installation button.
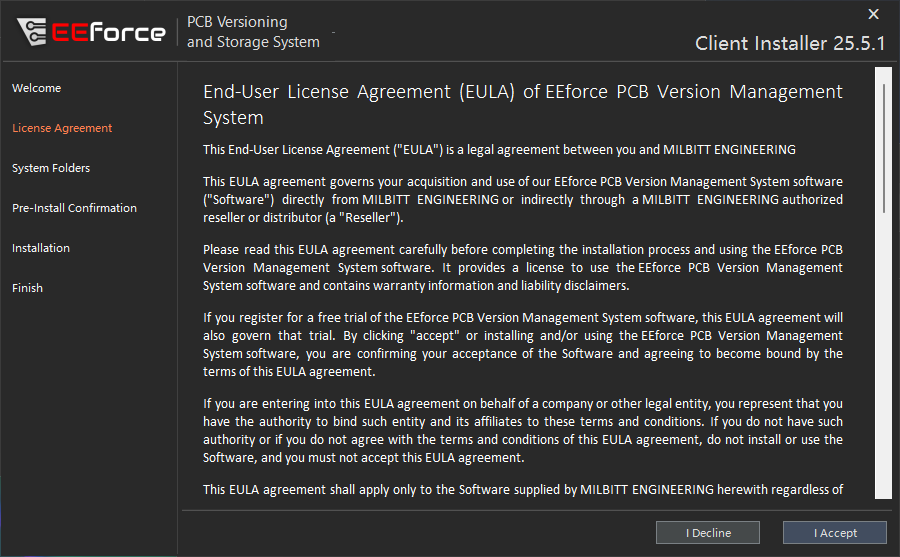
You should see the End User License Agreement. Please take time to read it carefully and press the I Agree button. Please note that approving this License Agreement is a legally binding action.
After accepting the License Agreement, the System Folders form will be displayed:
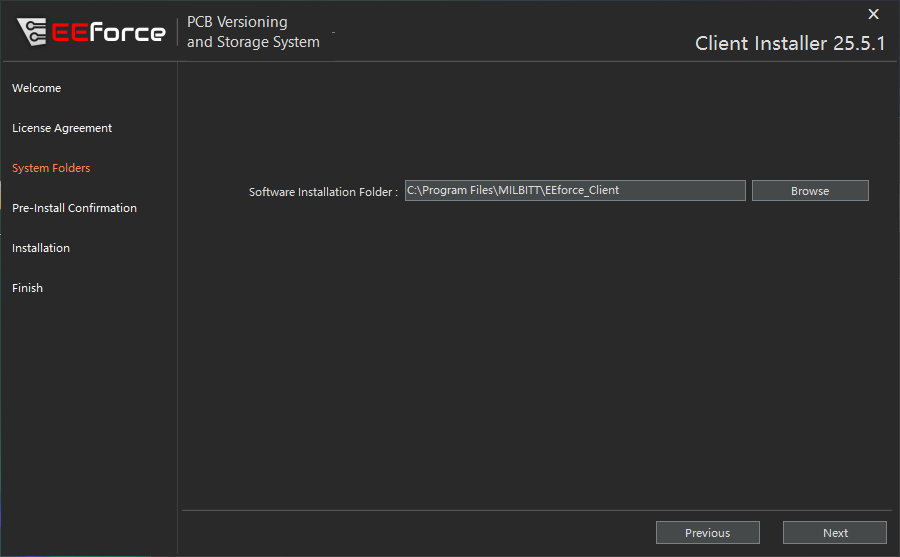
Software Installation Folder: This folder is used to store the software executables. It is recommended to use the default location. The required space is less than 50 MB.
Click Next to continue.
- The next screen is the final checkpoint before installation begins. Verify that the information entered on the previous screen is correct.
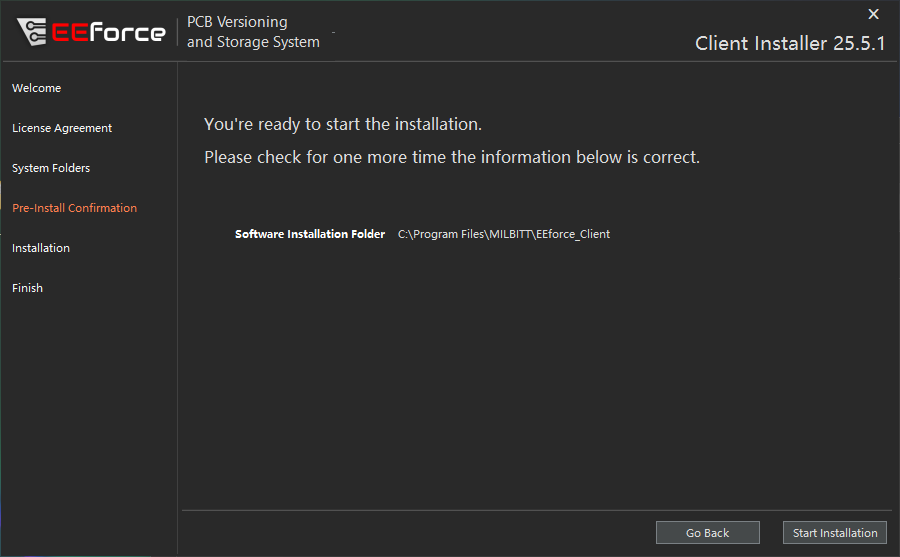
If the information is correct, click Start Installation.
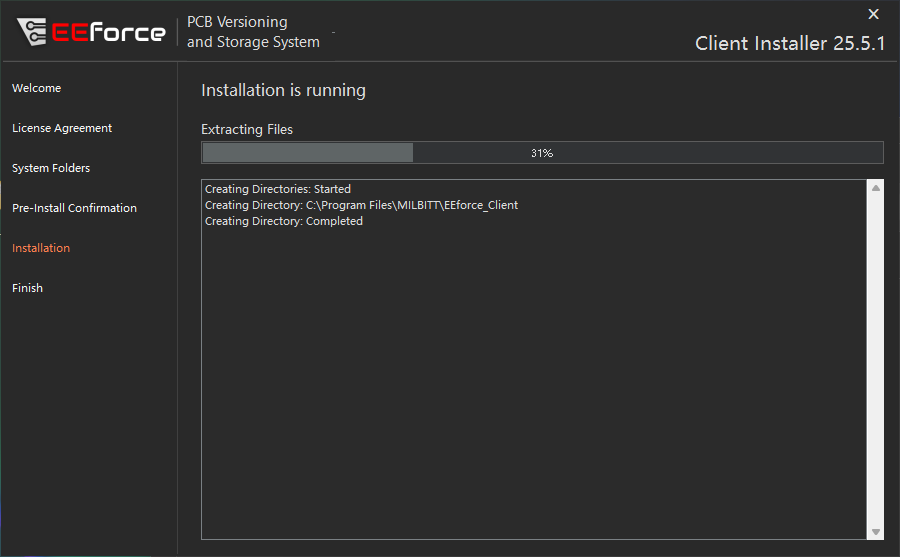 11. The installer will take care of the installation of the software at this stage. It should be fairly a short wait.
 12. When the installation is complete, the completion page will be displayed. This indicates that the installation was successful. Click Finish Installation to close the installer window.
First-Run
After installation, some configurations, such as the Server URL, must be updated. Follow the steps below to complete the configuration.
First Run Steps
- After the installation is finished, the EEforce icon should appear on your desktop. Click it to open the software.
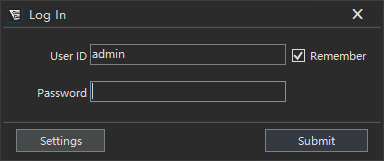
![]() 2. When the application opens, the login dialog will appear. The connection settings must be updated on the first start. Click the Settings button.
2. When the application opens, the login dialog will appear. The connection settings must be updated on the first start. Click the Settings button.
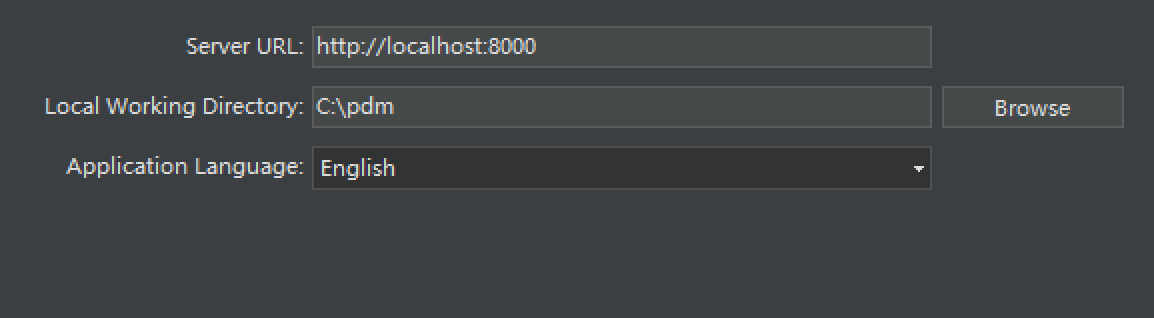
 3. In the settings window, update the Server URL input with your server address. This information is provided after the server installation. If you do not know your server address, contact your system administrator.
 4. After updating the Server URL, click the Save Configuration button.
Server URL in Testing Environment or Server Machine
If you are working on the Server Machine or installed the server on your local computer for testing purposes, you should be able to connect it using http://localhost:8000
- Return to the login window and enter the credentials provided by your administrator.
Default Admin Password
If you are deploying the system for the first time, use the default admin credentials.
User ID: admin
Password: Passw0rd
- When you enter the correct login credentials, the license selection window will appear.
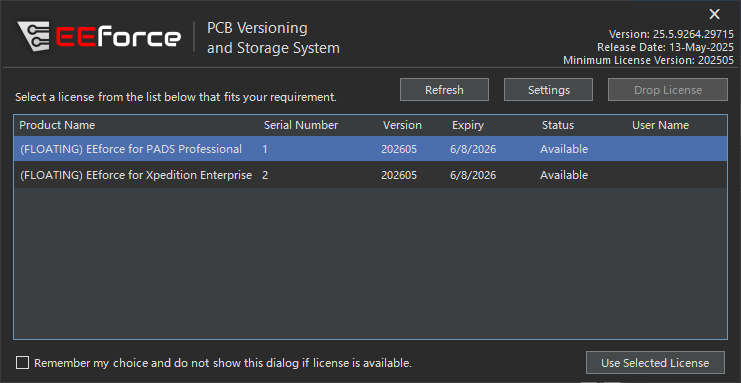
Select an available license and click the Use Selected License button.
- If the selected license is available, the main interface of the EEforce Client Software will be displayed.
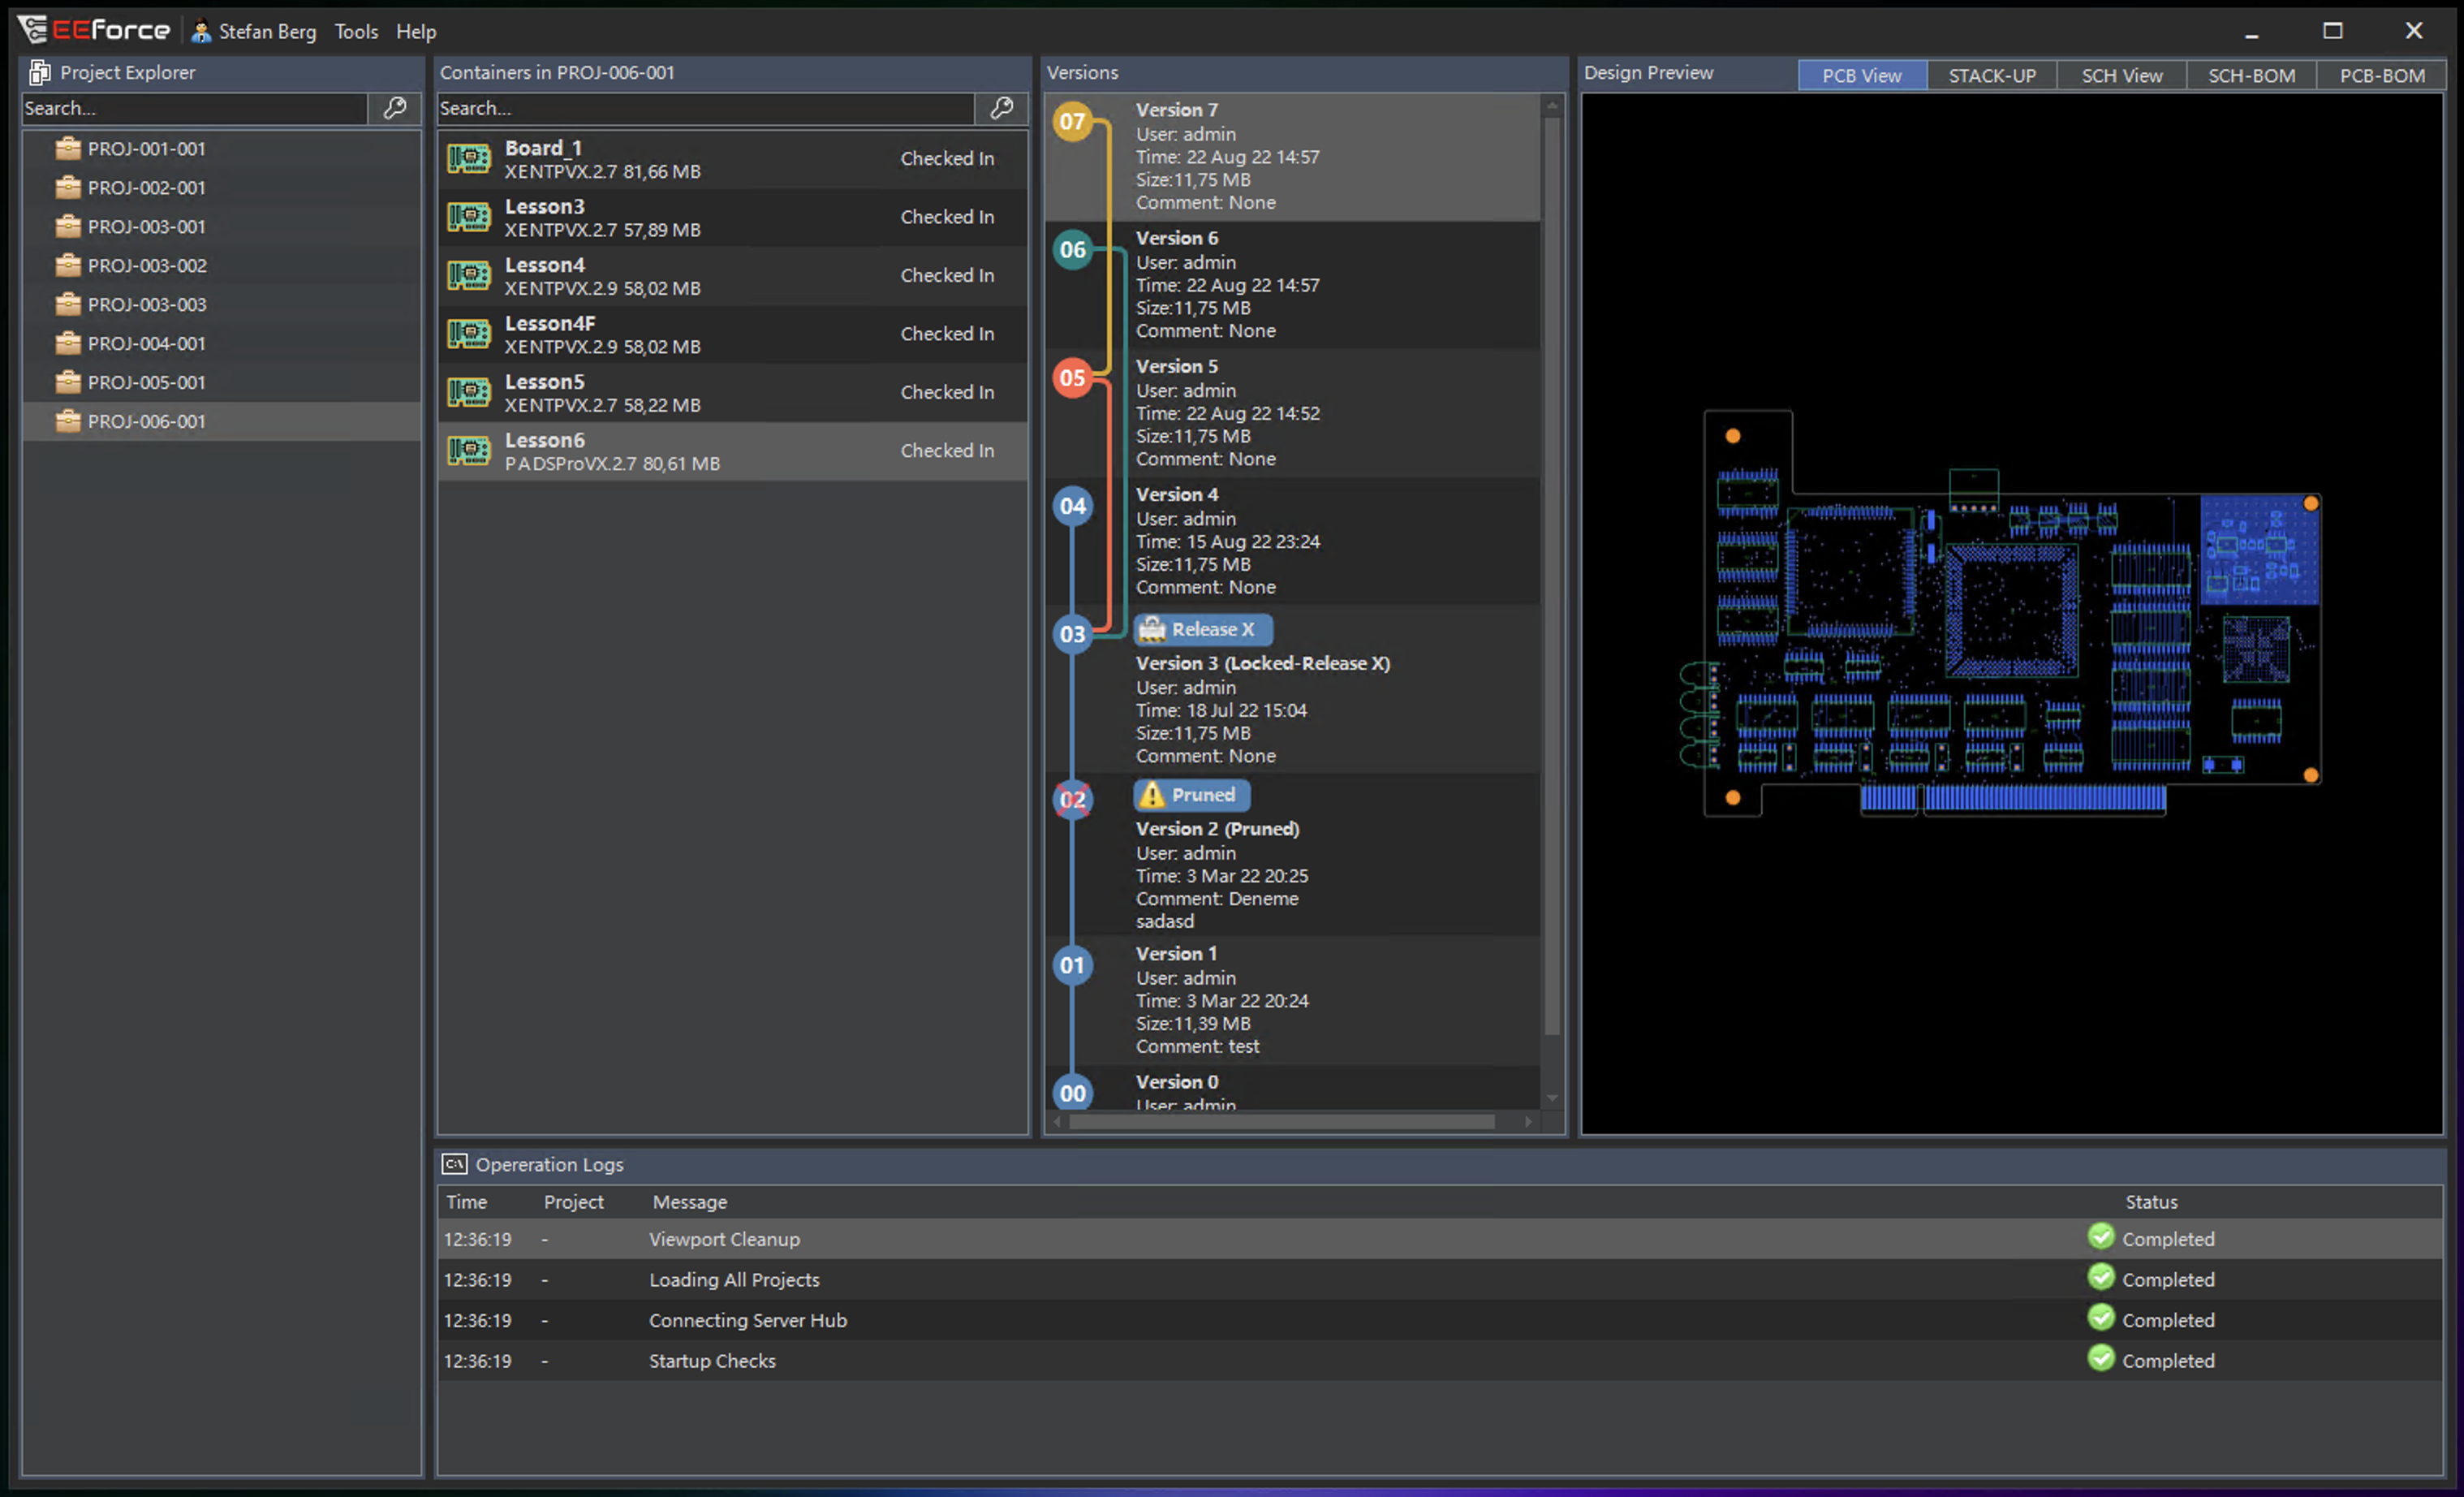
The installation and initial configuration of the EEforce Client are now complete. Next, configure the PADS/Xpedition installation locations. Refer to the Configuration section for more information.
Configurations
Before using the Client Software, complete the following configurations:
Configuration Steps
In the EEforce software, go to the Tools menu at the top of the screen and click Settings.

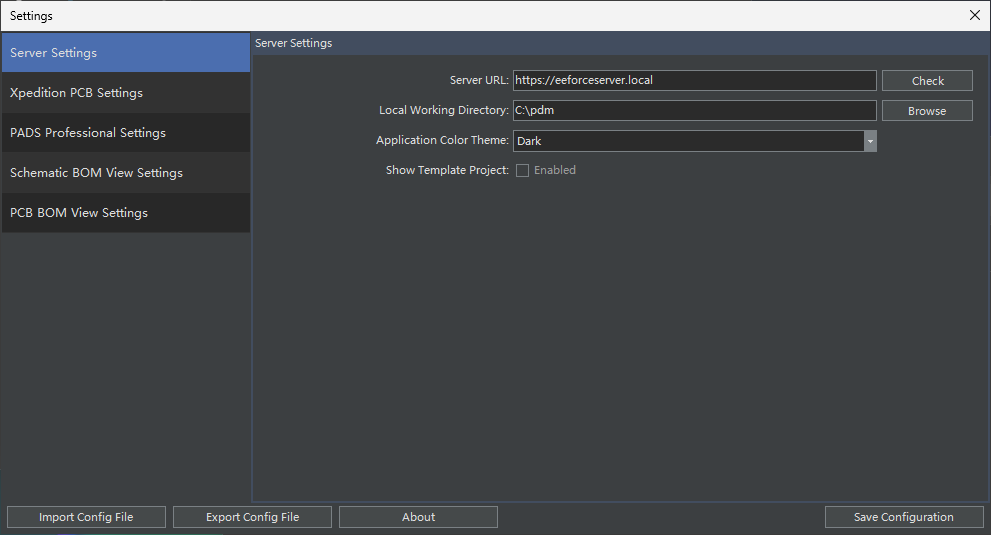
The Settings window will appear:
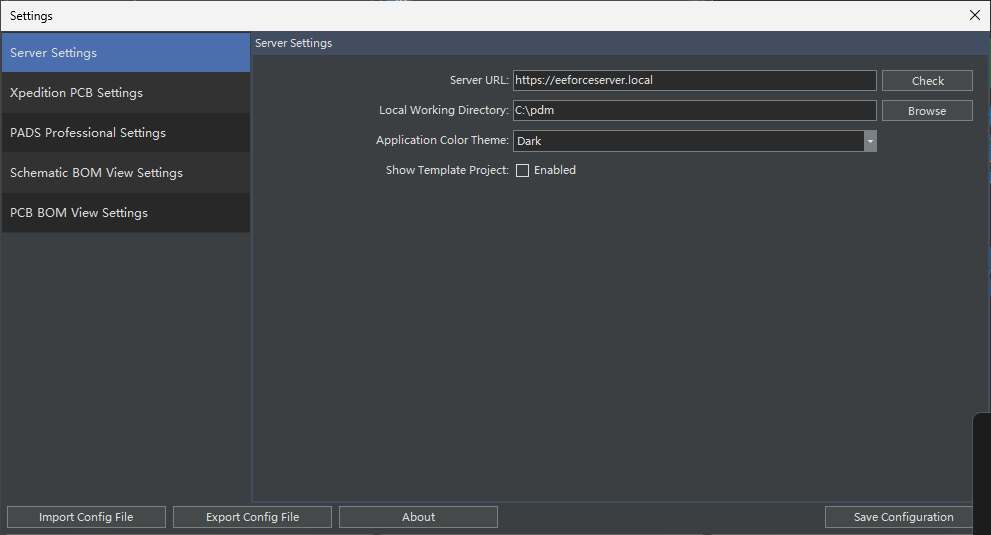
The Settings window contains three sub-windows: Server Settings, Xpedition PCB Settings, and PADS Professional Settings. Click the menu on the left side of the window to display the associated configuration page on the right side.
On the Server Settings page, you can edit the following settings:
- Server URL: The URL used to connect to the server. Obtain this information from your system administrator and do not change it unless explicitly instructed to do so.
- Local Working Directory: The software requires a local folder to download and open design files. This folder typically stores temporary files and should be a local folder.
- Application Language: Select the language for the user interface. This option is under development. Currently, only English is available. Additional languages will be added in future software updates.
On the Xpedition PCB Settings page, you can edit the following settings:
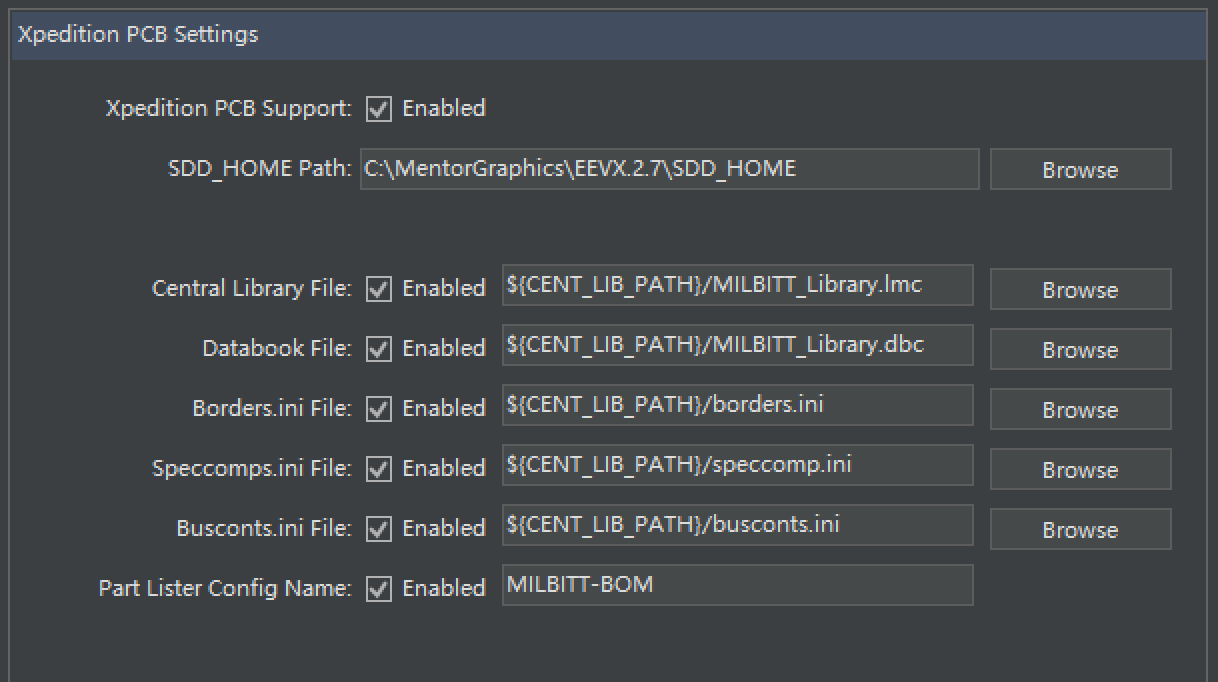
- Xpedition PCB Support: Enable or disable the use of Xpedition PCB. Designs created with Xpedition PCB cannot be opened if this option is disabled. Note that Xpedition support is an optional feature. Enabling this option does not grant access unless you are using the required license option.
- SDD_HOME Path: To use Xpedition PCB with EEforce software, specify the SDD_HOME folder in your Xpedition PCB installation path.
- Central Library File: Override the Central Library file settings specified in the PRJ file. This is an optional operation. Use environment variables (as in the example) or specify an LMC file directly.
- Databook File: Override the Databook file settings specified in the PRJ file. This is an optional operation. Use environment variables (as in the example) or specify a DBC file directly.
- Borders.ini File: Override the Borders.ini file settings specified in the PRJ file. This is an optional operation. Use environment variables (as in the example) or specify an INI file directly.
- Speccomps.ini File: Override the Speccomps.ini file settings specified in the PRJ file. This is an optional operation. Use environment variables (as in the example) or specify an INI file directly.
- Busconts.ini File: Override the Busconts.ini file settings specified in the PRJ file. This is an optional operation. Use environment variables (as in the example) or specify an INI file directly.
- Part Lister Config Name: Override the Part Lister Config Name settings specified in the PRJ file. This is an optional operation. Before using this configuration, ensure that a BOM configuration file with the same name exists in the WDIR or project folder.
On the PADS Professional Settings page, you can modify the following settings:

- PADS Professional Support: Enable or disable the use of PADS Professional. Designs created with PADS Professional cannot be opened if this option is disabled.
- SDD_HOME Path: To use PADS Professional with EEforce software, specify the SDD_HOME folder in your PADS Professional installation path.
- Central Library File: Override the Central Library file settings specified in the PRJ file. This is an optional operation. Use environment variables (as in the example) or specify an LMC file directly.
- Databook File: Override the Databook file settings specified in the PRJ file. This is an optional operation. Use environment variables (as in the example) or specify a DBC file directly.
- Borders.ini File: Override the Borders.ini file settings specified in the PRJ file. This is an optional operation. Use environment variables (as in the example) or specify an INI file directly.
- Speccomps.ini File: Override the Speccomps.ini file settings specified in the PRJ file. This is an optional operation. Use environment variables (as in the example) or specify an INI file directly.
- Busconts.ini File: Override the Busconts.ini file settings specified in the PRJ file. This is an optional operation. Use environment variables (as in the example) or specify an INI file directly.
- Part Lister Config Name: Override the Part Lister Config Name settings specified in the PRJ file. This is an optional operation. Before using this configuration, ensure that a BOM configuration file with the same name exists in the WDIR or project folder.
On the Schematic BOM Settings page, you can modify the following settings:
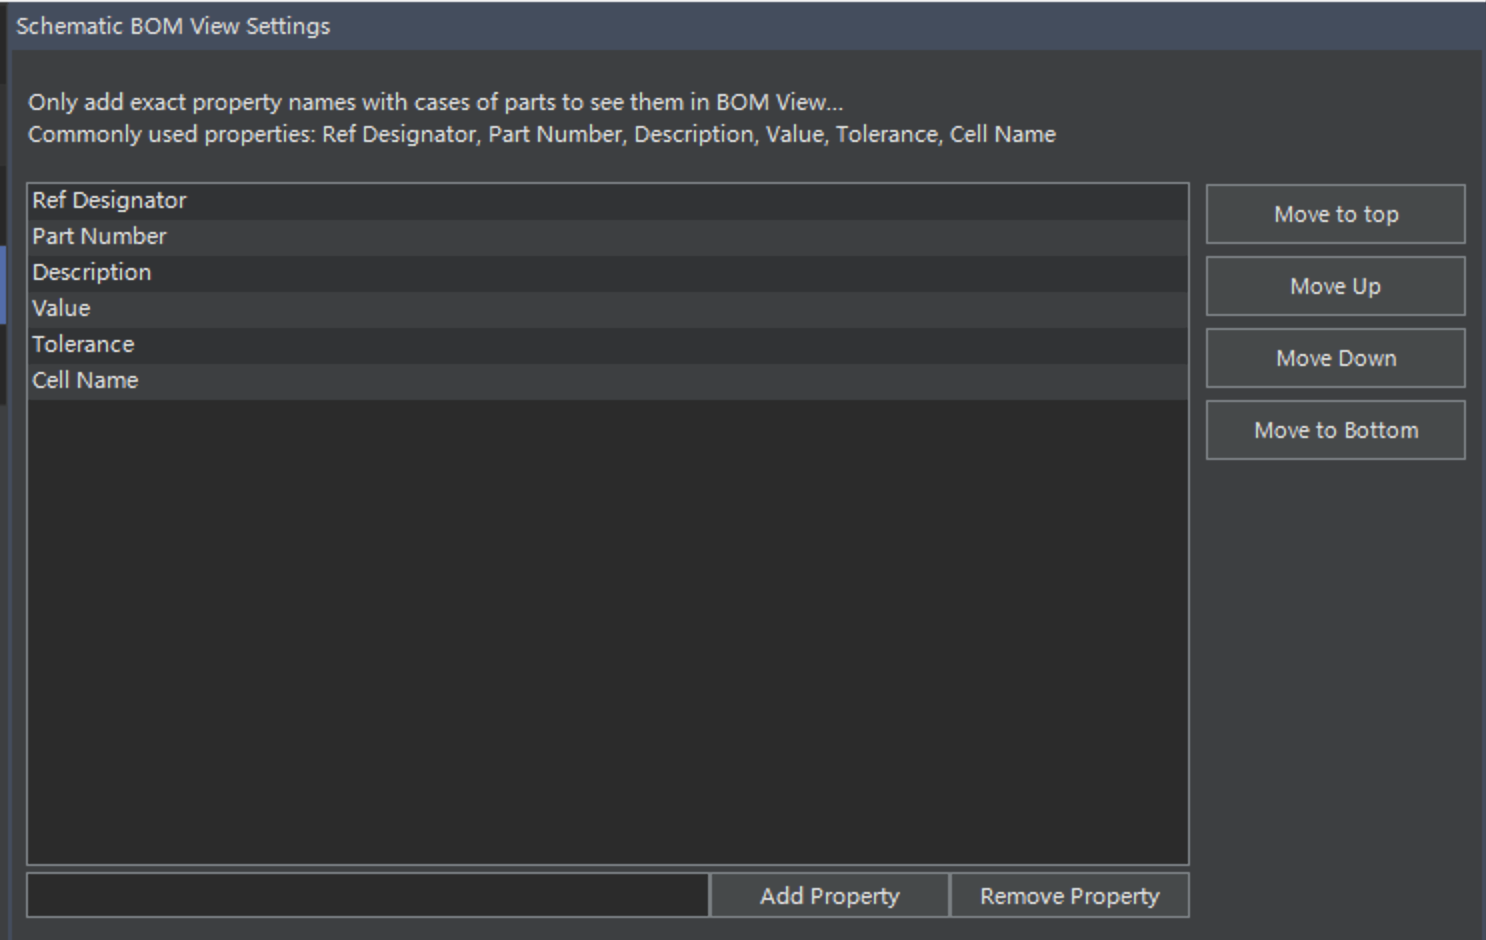
- Add or remove parameters that would be visible on the SCH BOM Preview
- Reorder parameters
On the PCB BOM Settings page, you can modify the following settings:
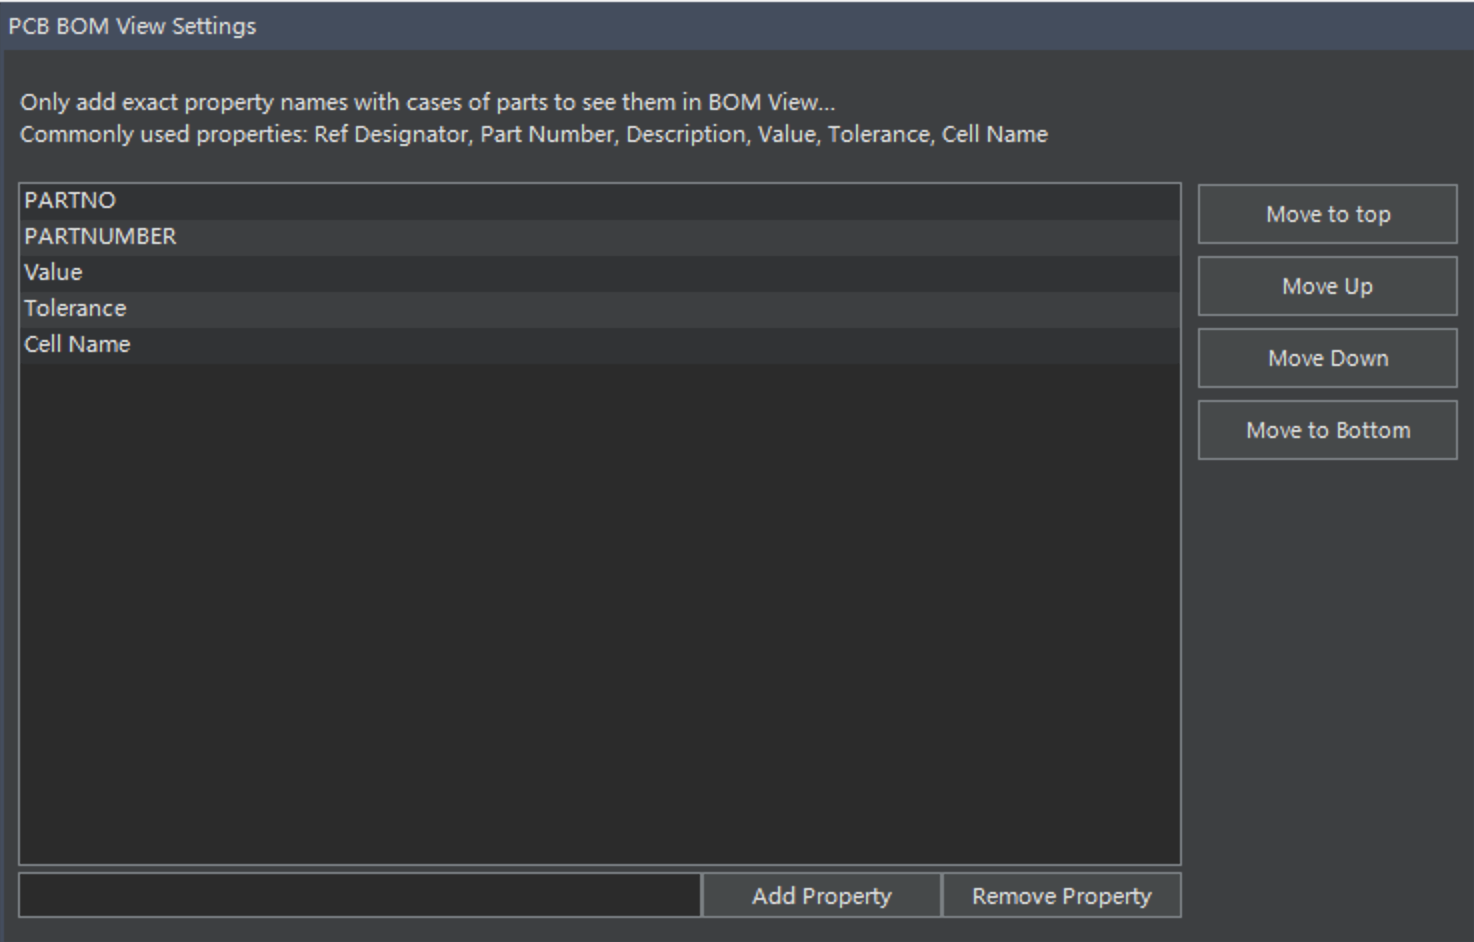
- Add or remove parameters that would be visible on the PCB BOM Preview
- Reorder parameters